Monday, September 29, 2014

Mediterranean Bread


Every Saturday, I head down to the farmer's market to pick up some fresh produce and my favourite Mediterranean bread.  This bread is full of Italian seasonings and olives and sends a warming herbaceous scent through the house when I toast it up each morning for breakfast.  When I get it home from the market, I immediately slice it, divide it up into pairs, bag it, and freeze it.  That way, it's ready to be quickly tossed into the toaster each morning and lasts all week (well, that is unless Scott decides he's going to indulge).

Unfortunately, this week I was forsaken by my favourite baker when I showed up in the bitter cold to find out that the last of the Mediterranean bread was gone. Alas, what was a poor, breadless girl to do?  Well, the only thing she could do, roll up her sleeves and bake her own - the travesty!

This recipe is adapted from one by the bread god Peter Reinhart.  The dough is super easy to make, does not require a huge commitment, can be stored in the fridge for up to four days before baking, and produces two bakery-quality loaves.  If you've never baked your own bread before, now is the time to try.  If you just want a regular white French loaf, omit the herbs and olives.  This can also be made into buns, but will require less cooking time.

Before you begin, read through all the directions.  It looks as though there are many steps, but it is actually quite simple.

Makes two loaves.

Ingredients:

5 1/2 cups of bread flour
 2 tsp sea salt
2 tsp instant quick rise yeast
1 Tbsp plus 2 tsp Italian seasoning
1/2 tsp garlic powder
2 to 2 1/2 cups of lukewarm water (about body temperature)
1/4 cup chopped olives (mixed varieties for better flavour) tossed with 1 Tbsp flour

Directions:

Preparation:

1. Mix the flour, salt, yeast, and spices together in a bowl.  Add 2 cups of the water and stir with a spoon.  Continue to add up to a half cup more water until the dough has formed a shaggy ball that is tacky but not sticky.  Stir for one minute.  Cover with plastic wrap and let rest for 5 minutes.

2. Take the dough out of the bowl, place on a lightly floured surface, and knead for 3 minutes.  While you are kneading, work the olives into the dough by adding them to the middle, folding the dough over to cover them, and kneading more.  Add more flour if necessary, but keep it tacky.  Do not over flour.

3. Form the dough into a ball and place it back into the bowl, which has been lightly oiled.  Cover with lightly oiled plastic wrap and refrigerate overnight or up to 4 days.


Baking:

1. Remove the dough from the fridge at least 2 hours before you want to bake it.  Gently divide it in half being careful not to burst the air pockets that have formed inside the ball.  Turn each half over, fold the top and bottom towards the middle of the ball and pinch the seam closed.  Turn it back over and place on a parchment-lined baking sheet.  Cover with the lightly oiled plastic wrap.  Let rise until it is 1 1/2 times its original size.

*Note: In order for the dough to rise, the room needs to be warm.  Since Scott and I are in a constant battle to control the temperature of the house (he opens the windows, I close them; he turns down the thermostat, I turn it up), I put the dough in the oven with the light on to rise.  When I baked these loaves, I actually let them rise for about four hours because I did not feel that they had risen enough after two hours.  Our house was pretty chilly this morning...


2. Place one of the oven racks on the very lowest shelf and the other one on the middle shelf.  On the lower rack, place a metal tray or lasagne pan.  Preheat the oven to 500 degrees Fahrenheit.

3. Fifteen minutes before you want to bake, remove the plastic wrap from the dough.

4. Immediately before baking, pour one cup of water in the tray in the oven, and gently make four slashes on each loaf with a bread knife. Place the loaves on the middle rack.

5. As soon as the loaves are in the oven, turn the temperature down to 450 degrees Fahrenheit.

6. After 15 minutes, turn and rotate the pans and bake for approximately 12-15 more minutes.  You will know when the bread is done because it will sound hollow when you tap the bottom of it.


7. Immediately remove the bread from the baking tray and place on a cooling rack for at least an hour before slicing.


8. The bread will keep for about a day if wrapped in a kitchen towel, but as mentioned above, I prefer to slice and freeze it for maximum freshness.  (This way you also don't feel tempted to inhale an entire loaf of bread in 24 hours!).  Enjoy!

Now, to figure out how to add some whole wheat flour and still get the same amount of rise...

Shopping Tips:

1. It is important for yeast breads to use bread flour and not all purpose flour.  The percentage of gluten is higher, which results in a higher rise.

2. Select a combination of olives that taste good to you.  I chose Kalamata and pink olives, which are both quite fruity, but my favourite baker uses a mixture of green and black.  If they don't taste good before you bake them, they certainly aren't going to taste good after you bake them.  Save yourself the headache, and buy olives that are already pitted.  If for some reason you don't, simply smash each one with the side of your knife to remove the pit with your fingers before chopping them.

Monday, September 22, 2014

Best Ever Vegetarian (or Vegan) Lasagne


I'm not going to lie to you - this recipe takes time.  An hour and a half, to be exact. Plus 50 minutes cooking time.... But, the upside is that you get two recipes for the price of one, and one of them is the most nutritious and delicious lasagne you have ever tasted!  Full of vegetables, legumes, and nuts, this is definitely a filling meal, and you will never miss the heavy, greasy meat that is so often indicative of traditional lasagnes.  As a bonus, you can add canned artichokes to the leftover spinach mixture for a hearty vegan spinach and artichoke dip.

I assembled and baked this in the morning and then just re-heated it for supper on Sunday.

Serves 8.

Ingredients:

Extra virgin olive oil
Sea salt and pepper (it is important to season as you go)

1 large eggplant
2 medium zucchini
1 small onion
4 cloves garlic
1 clamshell of baby spinach
1 pound mixed mushrooms (not button mushrooms), chopped roughly
2 tsp Italian seasoning
700g jar pomodoro sauce (sieved tomatoes found near the pasta or pizza sauce)
1/4 cup water
1/4 fresh basil, finely sliced

1 cup raw cashews (soaked for at least 4 hours)
1/2 cup water
1/4 cup nutritional yeast
3 tsp cider vinegar (white wine vinegar or lemon juice would work, too)
1 tsp salt
pinch of cayenne pepper
half a 19oz can of chickpeas, drained and rinsed

9 oven-ready lasagne noodles
1 cup of shredded mozzarella (use vegan cheese if you want this to be a vegan dish)

Directions:

1. Cut the eggplant lengthwise into 1/4 inch slices.  Season generously with salt, place in a colander in the sink and let drain for 45 minutes.  After, rinse the bitter juices off and pat dry with kitchen towel.


2. Cut the zucchini lengthwise into 1/4 inch slices.  Let sit on the cutting board for at least 30 minutes (I learned this in Italy, and it will benefit any zucchini dish).


3. Meanwhile, sauté 1/2 the onion and 2 cloves of garlic in 2 tsp of oil until softened.  Add the spinach, salt, and pepper and cook until wilted.  Remove from pan and set aside to cool.

4. Sauté the other half of the onion and 2 cloves of garlic, salt, and pepper in 1 Tbsp of oil until softened.  Add the mushrooms and the Italian seasoning and cook until the are browned and half their original size.  Add the pomodoro sauce (rinse out the jar with the 1/4 cup water, and add that, too) and remove from the heat.  Add in the fresh basil.

5. Preheat the oven to 500 degrees Fahrenheit.

6. Place the zucchini slices on two parchment-lined baking sheets, brush with oil, and season lightly with salt and pepper.  Roast in the oven for about 10 minutes.  Remove and set aside. Turn the oven down to 350 degrees Fahrenheit!

7. Place the eggplant on two baking sheets newly lined with parchment paper.  Brush with oil and season lightly with salt and pepper.  Roast in the oven for about 8 minutes.  Remove and set aside.

8. Drain and rinse the cashews.  In a food processor, puree the cashews, water, nutritional yeast, vinegar, salt, and cayenne pepper.  Add the chickpeas and puree again.  Add the reserved spinach mixture and puree again.  If you have a bullet-type blender, do a half at a time in two batches.


9. Now it's time to assemble the lasagne!

a) Spread 1/3 of the tomato sauce on the bottom of a 9" by 13" lasagne dish.

b) Layer with three lasagne sheets, not overlapping.  There will be space between them, but they will expand as they cook.

c) Layer the zucchini widthwise.


d) Add another 1/3 of the tomato sauce over the zucchini.

e) Lay 3 more noodles lengthwise.

f) Spread 1 1/4 cups of the spinach mixture on top of the noodles.  (Reserve the rest of the spinach mixture for the spinach and artichoke dip recipe that follows).


g) Layer 3 more noodles lengthwise.

h) Cover the noodles with overlapping slices of eggplant.

i) Spread the remaining 1/3 of the tomato sauce on top of the eggplant.


j) Sprinkle the shredded mozzarella on top.

10. Bake for 50 minutes at 350 degrees Fahrenheit.  Remove from the oven and let sit for 10 minutes.  Phew!  Enjoy!


Vegan Spinach and Artichoke Dip:

Add one drained and rinsed can of artichokes to the food processor with the leftover spinach mix from the lasagne recipe above.  Adjust seasoning, if necessary.  If you want, you can place this in an oven-safe dish, top with shredded mozzarella cheese, and bake at 350 degrees Fahrenheit for twenty to thirty minutes for a hot dip.  Serve with tortillas of pita chips.  Yum!

Grilled Veggie Wraps:

If you have leftover grilled zucchini or eggplant, serve it with the remaining spinach mixture or even hummus, in a wrap with mixed lettuce.  Add roasted red peppers and goat cheese for a great sandwich.

Shopping Tips:

1. See here for more information about nutritional yeast.


Monday, September 15, 2014

Savoury Autumn Pita Pockets


Scott asked for something that was vegetarian and could be eaten in a pita pocket.  Why?  Because it would be easy to heat up and assemble on a weeknight.  Sounds reasonable...

There are so many variations to this dish, the possibilities are endless.  You could eat it without the pita pocket as a warm potato salad (very yummy), you could add white beans, you could add strips of sirloin steak, you could even leave out the squash and potatoes and eat the zucchini and chard as a side to any meaty or eggy dish.  If you don't have swiss chard, you could use kale, spinach, or beet greens.  If you can't find delicata squash (they really are great), you could use butternut instead.

You can use any kind of pita pockets you want for this, but I used Happy Camel spinach and herb pitas that I got at the farmer's market.  I will admit, this makes a huge batch.  For some reason, I got the most ginormous bunch of swiss chard for $3.  It was so large, that I used mostly the stalks and only some of the leaves.  However, if you get a reasonably sized bunch (no more than 10 stalks), you might want to just make a half a batch.

This recipe makes about 8 large pita pockets.


Ingredients:

3 Tbsp extra virgin olive oil (divided)
1 pound baby potatoes, chopped into cubes
2 - 3 small delicata squash (or butternut), seeded and chopped into cubes (skin on)

1/8 tsp red pepper flakes
1 onion, chopped
2 medium zucchini, chopped into cubes
2 cloves garlic, minced
1 Tbsp Italian seasoning
1 bunch swiss chard (see note above), chopped finely
2 tsp honey (or agave syrup for a vegan option)
2 Tbsp balsamic vinegar
salt, pepper

Directions:

1. Preheat the oven to 450 degrees Fahrenheit.

2. Toss cubed potatoes with 1 Tbsp oil.  Spread into even layer on parchment-lined baking sheet and sprinkle with salt.  Do the same thing for the squash.

3. Bake the potatoes and squash in the oven for about 18-20 minutes, turning once halfway through cooking.  They should be tender and lightly browned when they are done.

4. In the meantime, in a large skillet, sauté the oil, red pepper flakes, and onion until soft, about 5 minutes.

5. Add the garlic, Italian seasoning, and zucchini and sauté until tender, about 10 minutes.

6. Add the chard stems and cook until tender, about 5 minutes.

7. Add the shredded chard leaves and cook until wilted, about 3 minutes.

8. Add the honey and vinegar and reduce, about 1 - 2 minutes.


9. Remove from the heat and toss with the potatoes and squash. You can top with fresh basil, if you want.  Enjoy!


Shopping Tips:

1. Delicata squash look kind of like small footballs.  They are a light yellow/orange colour with green stripes.  Sometimes they are in the organic section.  Like I stated above, if you can't find them, you can use butternut squash.

2. Swiss chard is sometimes called rainbow chard or just chard.  It might have red, yellow, or white stalks.  It all tastes the same.  As stated above, you can always use kale, spinach, or beet greens instead.

3. If you can't find Italian seasoning, although it is pretty common in the spice section, use a combination of dried oregano/thyme/basil.


Monday, September 8, 2014

Baked Eggs in Tomato Pepper Sauce


The other day I craved something I haven't eaten in over twenty years - a fried egg sandwich smothered in sugary ketchup.  After immediately indulging, I started to wonder if there wasn't a more grown-up version.  This wonderful dish is the result of those musings.  The deep rich flavours are much more satisfying than bottled ketchup, and the addition of peppers makes it more substantial as well.  This dish is all about developing layers of flavour - and it is well worth the wait.  This would be perfect for a rainy fall dinner served with toasted crusty bread or even over rice (I prefer toast, Scott prefers rice - the same way we like our chili!).

One side note, though.  I forgot to tell Scott what he was eating, and he was a bit disappointed that the eggs weren't mounds of melted mozzarella.  Not a bad idea, though...

Because this recipe is developed over time with the addition of more and more ingredients, it is one of those dishes that should be "seasoned as you go".  This means to add a bit more salt with each addition of new ingredients in order to make sure that it is seasoned correctly.

Serves 4 - 5.

Ingredients:

2 Tbsp extra virgin olive oil
1 large onion, quartered and sliced thinly
2 cloves of garlic, sliced thinly
a pinch - 1/8 tsp red pepper flakes, depending on how spicy you want it.
1 Tbsp brown sugar
1 Tbsp paprika
3 bell peppers sliced thinly (I used one red, one orange, and one yellow)
10 - 14 cocktail tomatoes
1 cup passata (or 28 oz diced tomatoes instead of cocktail tomatoes and passata)
1 tsp Italian herbs (or oregano and/or thyme)
1 pinch saffron (optional)
4 -5 large eggs
2 Tbsp fresh basil, chopped
salt, pepper

Directions:

1. In a large oven-safe skillet or pan, sauté the oil, onion, garlic, red pepper flakes, brown sugar, paprika, salt, and pepper until the onion is soft and caramelized, about 10 - 15 minutes.  This is a dish that is sticky and will develop colour on the bottom of the pan, but if it looks like it is going to burn, add a splash of water.


2. Add the bell peppers and a bit more salt, and sauté for another 15 minutes until they are very soft.  When you think they are done, keep cooking them a bit longer.

3. Preheat the oven to 350 degrees Fahrenheit.

4. Add the tomatoes and passata (or diced tomatoes) along with the Italian herbs, saffron (if using), and a bit more salt, and cook for another 15 minutes, until the sauce is rich and thick.


4. Break one egg into a small bowl.  Make a well in the tomato sauce and pour the egg from the bowl into the sauce.  Repeat with the remaining three eggs.

5. Transfer the pan to the oven and bake for 10 - 12 minutes, depending on how runny you like your yolks.  Finish with fresh basil. Enjoy!


Shopping Tips:

1. Passata is strained tomatoes and is sold in jars near the pasta sauce.

2. Saffron, the hand-picked stigma of the crocus flower, is the most expensive spice.  It adds another layer of flavour here, but is not absolutely necessary.

3. If you cannot find cocktail tomatoes, use canned diced tomatoes instead.  Cocktail tomatoes are very juicy and will give this dish the liquid it needs.  This is a great winter dish when made with canned tomatoes.


Monday, September 1, 2014

Chocolate Zucchini Bread


Well, it was bound to happen - summer is over and it's time to go back to work/school.  Sounds like it's time for a treat.  If you have not already been given a gigantic zucchini from someone's garden, it's probably because you are trying to get rid of the ones from your own garden, which is why pretty much everyone is making zucchini bread right now.  This recipe uses 2 whole cups of zucchini per loaf (so it's great for using up large quantities) and is lower in sugar than many other recipes, which I prefer.  This recipe can be easily doubled.

P.S. I have heard that some people's comments were not published.  I always publish and respond to comments, so please repost if you do not see your comment after 48 hours.  I love to hear your responses to the recipes, so please let me know if you've tried something!

Ingredients for one loaf:

1 cup all purpose flour
1/4 cup whole wheat pastry flour
1/4 cup unsweetened cocoa
1 tsp baking soda
1/2 tsp salt
1/2 tsp cinnamon
1/2 cup coconut sugar (or packed brown sugar)
2 eggs
1/4 cup butter, melted or organic canola oil
1/2 tsp vanilla
2 cups shredded, packed zucchini

Directions:

1. Preheat oven to 350 degrees Fahrenheit.

2. In an medium bowl, whisk together flour, cocoa, baking soda, salt, and cinnamon.

3. In a large bowl, whisk together sugar and eggs.  Slowly add in melted butter and vanilla.  Add zucchini.

4. In two portions, add the dry ingredients to the wet ingredients.

5. Pour into a greased loaf pan and bake for 35 - 45 minutes.

 For a more decadent treat, top a slice of chocolate zucchini bread with a scoop of frozen vanilla yogurt, chopped dried cherries, and toasted almonds (not shown here). Enjoy!


Monday, August 25, 2014

Baked Eggplant Parmesan


One of my favourite vegetarian meals is eggplant parmesan, but many recipes require you to fry the eggplant before baking it, which adds a lot of extra calories as well as a lot of extra time.  This method of breading and then baking it solves both of those problems.  I have also reduced the amount of cheese and made it into cute individual stacks instead of a huge casserole, which requires more eggplant.  Because there are big, juicy tomatoes in season right now, you could try using a slice of tomato instead of the tomato sauce.

Serves 5

Ingredients:

1 large eggplant
2 eggs
2 cups spelt bread crumbs (or whole wheat bread crumbs)
salt
1 Tbsp Italian seasoning
1 jar marinara sauce
5 slices of fresh mozzarella or bocconcini
10 small basil leaves
1/2 cup parmesan cheese
pepper

Directions:

1. Slice eggplant into 10 rounds.  Salt liberally and place in colander for 30 - 60 minutes to drain.

2. Rinse eggplant thoroughly with water and pat each round dry on kitchen towel.

3. Preheat the oven to 375 degrees Fahrenheit.

4. In one dish, beat eggs with a pinch of salt.  In another dish, mix bread crumbs with Italian seasoning and 1/2 tsp salt.

5. Bread eggplant by using one hand to coat both sides in egg and the other hand to coat liberally with bread crumbs.  Place coated eggplant on a parchment-lined baking tray.  Bake in oven for 10 minutes on each side.


6. In a baking dish, place 2 Tbsp of marinara sauce in five dollops in the baking dish (5 Tbsp total).


7. Place a large eggplant round on each dollop of marinara sauce.  Top each round with another 2 Tbsp of sauce. Place a basil leaf on each round, then place a mozzarella slice on each round.


8. Top each stack with another eggplant round, another large dollop of sauce, and another basil leaf.  Season with pepper.  Divide the parmesan between the five stacks.


9. Bake in the oven for 30 - 40 minutes or until eggplant can be easily pierced with a sharp knife.  You may want to broil it for a couple of minutes at the end to brown the cheese on top. Enjoy!


Monday, August 18, 2014

Mexican Inspired Grilled Corn


While I was in Los Angeles last week, I had the wonderful opportunity to eat at Chef Curtis Stone's new restaurant, Maude, which has been rated best restaurant in L.A.  Normally the 25 seat restaurant fills up as soon as reservations open one month ahead of time, but when we got the call at 10 a.m. that a reservation for four had cancelled at the last minute for that night, we jumped at the chance.

The Maude kitchen

Each month, one seasonal ingredient is featured in a nine course tasting menu.  You don't order anything - it is a set menu that comes to you when it is ready.  The entire dinner featuring corn took 3 hours to eat and ended up being more like 11 courses excluding the homemade corn flakes and almond milk that we were given to enjoy the next morning.


One of our favourite dishes was inspired by the grilled Mexican corn dish called elotes.  Apparently the street version of this dish is sold outside many local Mexican grocery stores, but what we had was grilled corn elevated to a whole new level.  The recipe below is my version of the elotes we ate at Maude, with a few more local Canadian ingredients.

The elotes at Maude 


Serves 4 - 6.

Ingredients:

1/2 cup plain yogurt
1-2 cloves garlic, crushed
4 ears corn, husk removed
1 Tbsp extra virgin olive oil
1 Tbsp butter
Squeeze lime juice (about 1 Tbsp)
2 Tbsp fresh basil, chopped
1/2 fresh jalapeño, deseeded and finely minced
1/4 cup dry, crumbled feta cheese
pea shoots (optional)
salt

Directions:

1. Mix the yogurt and garlic together and set aside.

2. Brush or rub the corn cobs with the olive oil and grill them on a medium high barbecue for about 12 - 15 minutes, turning regularly.  You want the corn to get brown char marks on it, though.  Remove from heat, let cool slightly, and then use a knife to remove the corn from the cobs.


3. In a pan on the stove, heat the butter until it starts to turn brown.  Squeeze in the lime juice and turn down the heat so that it does not burn.  Quickly toss the jalapeño and corn kernels in the butter to reheat them and remove the pan from the heat.  Season with salt.

4. Serve the corn on a plate topped with the basil, feta, and pea shoots, if using.  Serve the garlic yogurt on the side of the plate.  Enjoy!


Shopping Tips:

1. Feta is more commonly sold packed in water, but it should also be available in dry form, which is much more desirable in this dish since it is being used as a substitute for Mexican cojita, which is hard to find in Canada.

Monday, August 11, 2014

Summer Frittata


This year I didn't plant a garden because I was expecting to have moved by this time (which hasn't happened yet), but for those of you who have, you must be just about ready to harvest your zucchini and tomatoes.  Last year at this time, I posted the summer pasta, this year I am giving you another option for those fresh veggies.  Frittatas are great weeknight meals because they are fast to prepare and can be made with a variety of veggies and cheese.  

Have you ever wondered what the difference is between a quiche, a frittata, and a strata?  The biggest difference is the starch they are made with.  Quiches are made with a pastry crust, frittatas are made with potatoes (although I have also seen them with pasta or rice), and strata are made with bread chunks.  Frittatas are great for using up the last bits of vegetables in the fridge as well as for using leftover rice, pasta, or boiled or roasted potatoes.

To deseed the tomatoes, just cut them into quarters and use your thumb to push out the seeds.

Serves 6.

Ingredients:

1 Tbsp extra virgin olive oil
1/2 small red onion (or one leek)
2 cloves garlic
1 zucchini, cut into quarter moons
8 asparagus spears, cut into 1/2 inch chunks
1/2 pound cooked potatoes
4 tomatoes, deseeded and chopped
2 - 4 Tbsp fresh basil
9 eggs
1 cup milk
2 tsp dijon mustard
1 cup shredded swiss cheese, grated

Directions:

1. Preheat the oven to 425 degrees Fahrenheit.

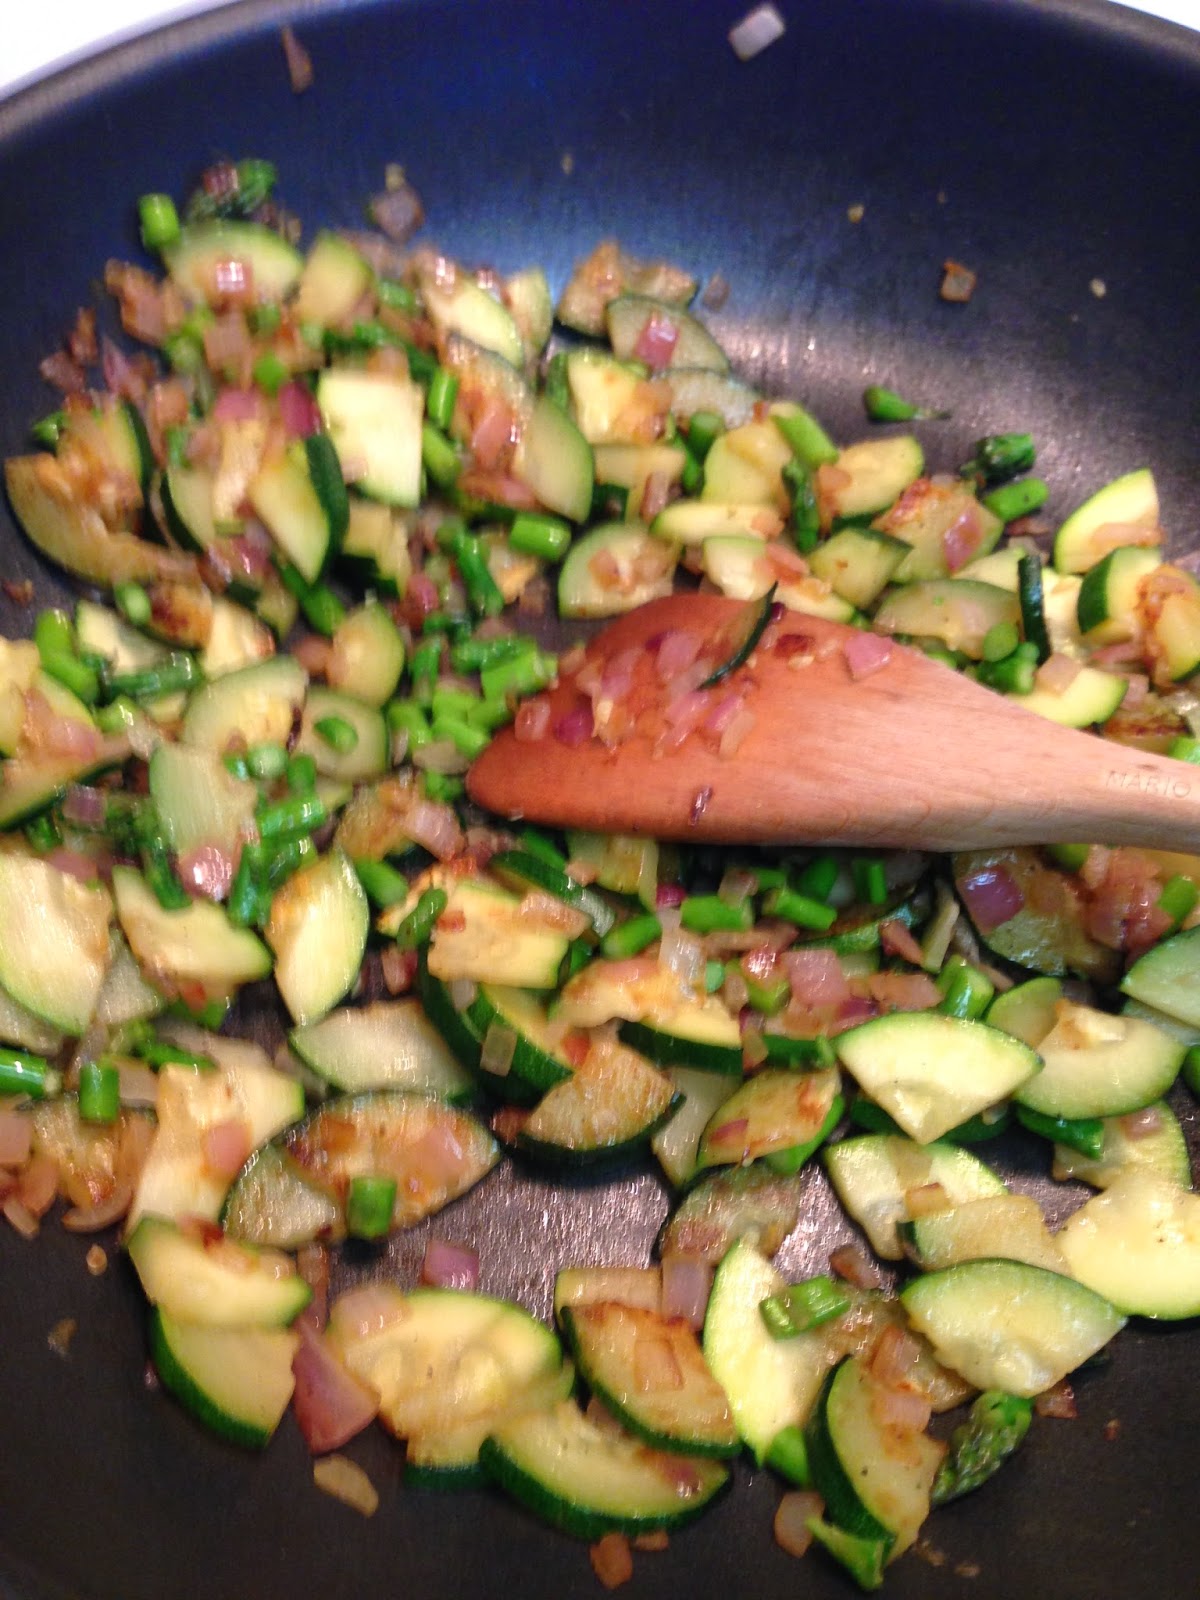
2. Sauté the onions, garlic, zucchini and asparagus until they are tender, about ten minutes.


3. Add the cooked chopped potatoes, tomatoes, and basil.


4. In a bowl, beat the eggs, milk, mustard, salt, and pepper and immediately add to the pan.  Allow the mixture to heat and set for about 3 minutes.


5. Top with the cheese and bake in the oven until set, about 10 minutes. It will still be jiggly when it is done, but when you cut it, the eggs will not run into the cut line.  If you would like it to be crispy on top, broil it for about 2 minutes at then end of the cooking time.


6. Let sit for at least 5 minutes before serving.  This is also great at room temperature or even cold out of the fridge.  You can eat leftovers on top of toast for an open-faced fried egg sandwich-type thing.


7. Enjoy!

Monday, August 4, 2014

Summer Salad Rolls


After two weeks of sweltering heat, the last thing I feel like doing is turning on the stove or oven.  In fact, doing so seems almost criminal at this point.  Luckily, this recipe does not require cooking at all.  I'll be honest, the first time I ever made these, they did not turn out.  They were soggy and wet and tasted like water.  Fortunately, I've worked out all the kinks so that your salad rolls will work out perfectly!  These really are a nice light but filling summer treat.

Makes about 12 rolls.

Ingredients:

12 round rice paper wrappers
75 grams vermicelli rice noodles
1 English cucumber, seeded and julienned
1 carrot, julienned
18 medium sized cooked shrimp
fresh cilantro and/or mint
greens (lettuce or spinach)
chopped peanuts

Sauce:
2 Tbsp natural nut butter of your choice
1 Tbsp rice wine vinegar
1 Tbsp lime juice
1 garlic clove
1/4 tsp red pepper flakes or hot sauce
1 Tbsp water
salt

Directions:

1. Break the rice noodles in half and place them in a large bowl.  Boil a kettle of water and pour the water on top of the noodles.  Let them soak for about 3 minutes.  Drain and rinse under cold water.  Set aside.


2. Cut the shrimp in half along their backs so that it looks like there are two.


3. Fill a pie plate with more boiling water from the kettle.  Place a rice wrapper in the water for 3 - 5 seconds.  It will still be hard when you take it out, that is okay.  It will continue to soften.  Place the wrapper on a plate.  It is now ready to be filled.  If you find it sticking to the plate, just put a small amount of water on the plate before you put the wrapper on it.


4. At the bottom of the wrapper, place three shrimp halves.  Top with some greens, then the herbs, then the carrot and cucumber, then the vermicelli noodles, and then the chopped peanuts.


5. Roll the two sides over the mixture and then roll it up from the bottom to the top.  When you are finished rolling, the shrimp should be showing through the bottom.


6. Whisk all the dipping sauce ingredients together and place in a serving dish.

 7. Enjoy!

Shopping Tips:

1. Vermicelli rice noodles and rice wrappers can be found in the Asian aisle of most major grocery stores.  The wrappers are dry, they are not the same as wonton wrappers.

2. Cooked shrimp are the pink ones, not the grey ones.
UA-45633129-1