Showing posts with label zucchini. Show all posts

Monday, September 22, 2014

Best Ever Vegetarian (or Vegan) Lasagne


I'm not going to lie to you - this recipe takes time.  An hour and a half, to be exact. Plus 50 minutes cooking time.... But, the upside is that you get two recipes for the price of one, and one of them is the most nutritious and delicious lasagne you have ever tasted!  Full of vegetables, legumes, and nuts, this is definitely a filling meal, and you will never miss the heavy, greasy meat that is so often indicative of traditional lasagnes.  As a bonus, you can add canned artichokes to the leftover spinach mixture for a hearty vegan spinach and artichoke dip.

I assembled and baked this in the morning and then just re-heated it for supper on Sunday.

Serves 8.

Ingredients:

Extra virgin olive oil
Sea salt and pepper (it is important to season as you go)

1 large eggplant
2 medium zucchini
1 small onion
4 cloves garlic
1 clamshell of baby spinach
1 pound mixed mushrooms (not button mushrooms), chopped roughly
2 tsp Italian seasoning
700g jar pomodoro sauce (sieved tomatoes found near the pasta or pizza sauce)
1/4 cup water
1/4 fresh basil, finely sliced

1 cup raw cashews (soaked for at least 4 hours)
1/2 cup water
1/4 cup nutritional yeast
3 tsp cider vinegar (white wine vinegar or lemon juice would work, too)
1 tsp salt
pinch of cayenne pepper
half a 19oz can of chickpeas, drained and rinsed

9 oven-ready lasagne noodles
1 cup of shredded mozzarella (use vegan cheese if you want this to be a vegan dish)

Directions:

1. Cut the eggplant lengthwise into 1/4 inch slices.  Season generously with salt, place in a colander in the sink and let drain for 45 minutes.  After, rinse the bitter juices off and pat dry with kitchen towel.


2. Cut the zucchini lengthwise into 1/4 inch slices.  Let sit on the cutting board for at least 30 minutes (I learned this in Italy, and it will benefit any zucchini dish).


3. Meanwhile, sauté 1/2 the onion and 2 cloves of garlic in 2 tsp of oil until softened.  Add the spinach, salt, and pepper and cook until wilted.  Remove from pan and set aside to cool.

4. Sauté the other half of the onion and 2 cloves of garlic, salt, and pepper in 1 Tbsp of oil until softened.  Add the mushrooms and the Italian seasoning and cook until the are browned and half their original size.  Add the pomodoro sauce (rinse out the jar with the 1/4 cup water, and add that, too) and remove from the heat.  Add in the fresh basil.

5. Preheat the oven to 500 degrees Fahrenheit.

6. Place the zucchini slices on two parchment-lined baking sheets, brush with oil, and season lightly with salt and pepper.  Roast in the oven for about 10 minutes.  Remove and set aside. Turn the oven down to 350 degrees Fahrenheit!

7. Place the eggplant on two baking sheets newly lined with parchment paper.  Brush with oil and season lightly with salt and pepper.  Roast in the oven for about 8 minutes.  Remove and set aside.

8. Drain and rinse the cashews.  In a food processor, puree the cashews, water, nutritional yeast, vinegar, salt, and cayenne pepper.  Add the chickpeas and puree again.  Add the reserved spinach mixture and puree again.  If you have a bullet-type blender, do a half at a time in two batches.


9. Now it's time to assemble the lasagne!

a) Spread 1/3 of the tomato sauce on the bottom of a 9" by 13" lasagne dish.

b) Layer with three lasagne sheets, not overlapping.  There will be space between them, but they will expand as they cook.

c) Layer the zucchini widthwise.


d) Add another 1/3 of the tomato sauce over the zucchini.

e) Lay 3 more noodles lengthwise.

f) Spread 1 1/4 cups of the spinach mixture on top of the noodles.  (Reserve the rest of the spinach mixture for the spinach and artichoke dip recipe that follows).


g) Layer 3 more noodles lengthwise.

h) Cover the noodles with overlapping slices of eggplant.

i) Spread the remaining 1/3 of the tomato sauce on top of the eggplant.


j) Sprinkle the shredded mozzarella on top.

10. Bake for 50 minutes at 350 degrees Fahrenheit.  Remove from the oven and let sit for 10 minutes.  Phew!  Enjoy!


Vegan Spinach and Artichoke Dip:

Add one drained and rinsed can of artichokes to the food processor with the leftover spinach mix from the lasagne recipe above.  Adjust seasoning, if necessary.  If you want, you can place this in an oven-safe dish, top with shredded mozzarella cheese, and bake at 350 degrees Fahrenheit for twenty to thirty minutes for a hot dip.  Serve with tortillas of pita chips.  Yum!

Grilled Veggie Wraps:

If you have leftover grilled zucchini or eggplant, serve it with the remaining spinach mixture or even hummus, in a wrap with mixed lettuce.  Add roasted red peppers and goat cheese for a great sandwich.

Shopping Tips:

1. See here for more information about nutritional yeast.


Monday, September 15, 2014

Savoury Autumn Pita Pockets


Scott asked for something that was vegetarian and could be eaten in a pita pocket.  Why?  Because it would be easy to heat up and assemble on a weeknight.  Sounds reasonable...

There are so many variations to this dish, the possibilities are endless.  You could eat it without the pita pocket as a warm potato salad (very yummy), you could add white beans, you could add strips of sirloin steak, you could even leave out the squash and potatoes and eat the zucchini and chard as a side to any meaty or eggy dish.  If you don't have swiss chard, you could use kale, spinach, or beet greens.  If you can't find delicata squash (they really are great), you could use butternut instead.

You can use any kind of pita pockets you want for this, but I used Happy Camel spinach and herb pitas that I got at the farmer's market.  I will admit, this makes a huge batch.  For some reason, I got the most ginormous bunch of swiss chard for $3.  It was so large, that I used mostly the stalks and only some of the leaves.  However, if you get a reasonably sized bunch (no more than 10 stalks), you might want to just make a half a batch.

This recipe makes about 8 large pita pockets.


Ingredients:

3 Tbsp extra virgin olive oil (divided)
1 pound baby potatoes, chopped into cubes
2 - 3 small delicata squash (or butternut), seeded and chopped into cubes (skin on)

1/8 tsp red pepper flakes
1 onion, chopped
2 medium zucchini, chopped into cubes
2 cloves garlic, minced
1 Tbsp Italian seasoning
1 bunch swiss chard (see note above), chopped finely
2 tsp honey (or agave syrup for a vegan option)
2 Tbsp balsamic vinegar
salt, pepper

Directions:

1. Preheat the oven to 450 degrees Fahrenheit.

2. Toss cubed potatoes with 1 Tbsp oil.  Spread into even layer on parchment-lined baking sheet and sprinkle with salt.  Do the same thing for the squash.

3. Bake the potatoes and squash in the oven for about 18-20 minutes, turning once halfway through cooking.  They should be tender and lightly browned when they are done.

4. In the meantime, in a large skillet, sauté the oil, red pepper flakes, and onion until soft, about 5 minutes.

5. Add the garlic, Italian seasoning, and zucchini and sauté until tender, about 10 minutes.

6. Add the chard stems and cook until tender, about 5 minutes.

7. Add the shredded chard leaves and cook until wilted, about 3 minutes.

8. Add the honey and vinegar and reduce, about 1 - 2 minutes.


9. Remove from the heat and toss with the potatoes and squash. You can top with fresh basil, if you want.  Enjoy!


Shopping Tips:

1. Delicata squash look kind of like small footballs.  They are a light yellow/orange colour with green stripes.  Sometimes they are in the organic section.  Like I stated above, if you can't find them, you can use butternut squash.

2. Swiss chard is sometimes called rainbow chard or just chard.  It might have red, yellow, or white stalks.  It all tastes the same.  As stated above, you can always use kale, spinach, or beet greens instead.

3. If you can't find Italian seasoning, although it is pretty common in the spice section, use a combination of dried oregano/thyme/basil.


Monday, August 11, 2014

Summer Frittata


This year I didn't plant a garden because I was expecting to have moved by this time (which hasn't happened yet), but for those of you who have, you must be just about ready to harvest your zucchini and tomatoes.  Last year at this time, I posted the summer pasta, this year I am giving you another option for those fresh veggies.  Frittatas are great weeknight meals because they are fast to prepare and can be made with a variety of veggies and cheese.  

Have you ever wondered what the difference is between a quiche, a frittata, and a strata?  The biggest difference is the starch they are made with.  Quiches are made with a pastry crust, frittatas are made with potatoes (although I have also seen them with pasta or rice), and strata are made with bread chunks.  Frittatas are great for using up the last bits of vegetables in the fridge as well as for using leftover rice, pasta, or boiled or roasted potatoes.

To deseed the tomatoes, just cut them into quarters and use your thumb to push out the seeds.

Serves 6.

Ingredients:

1 Tbsp extra virgin olive oil
1/2 small red onion (or one leek)
2 cloves garlic
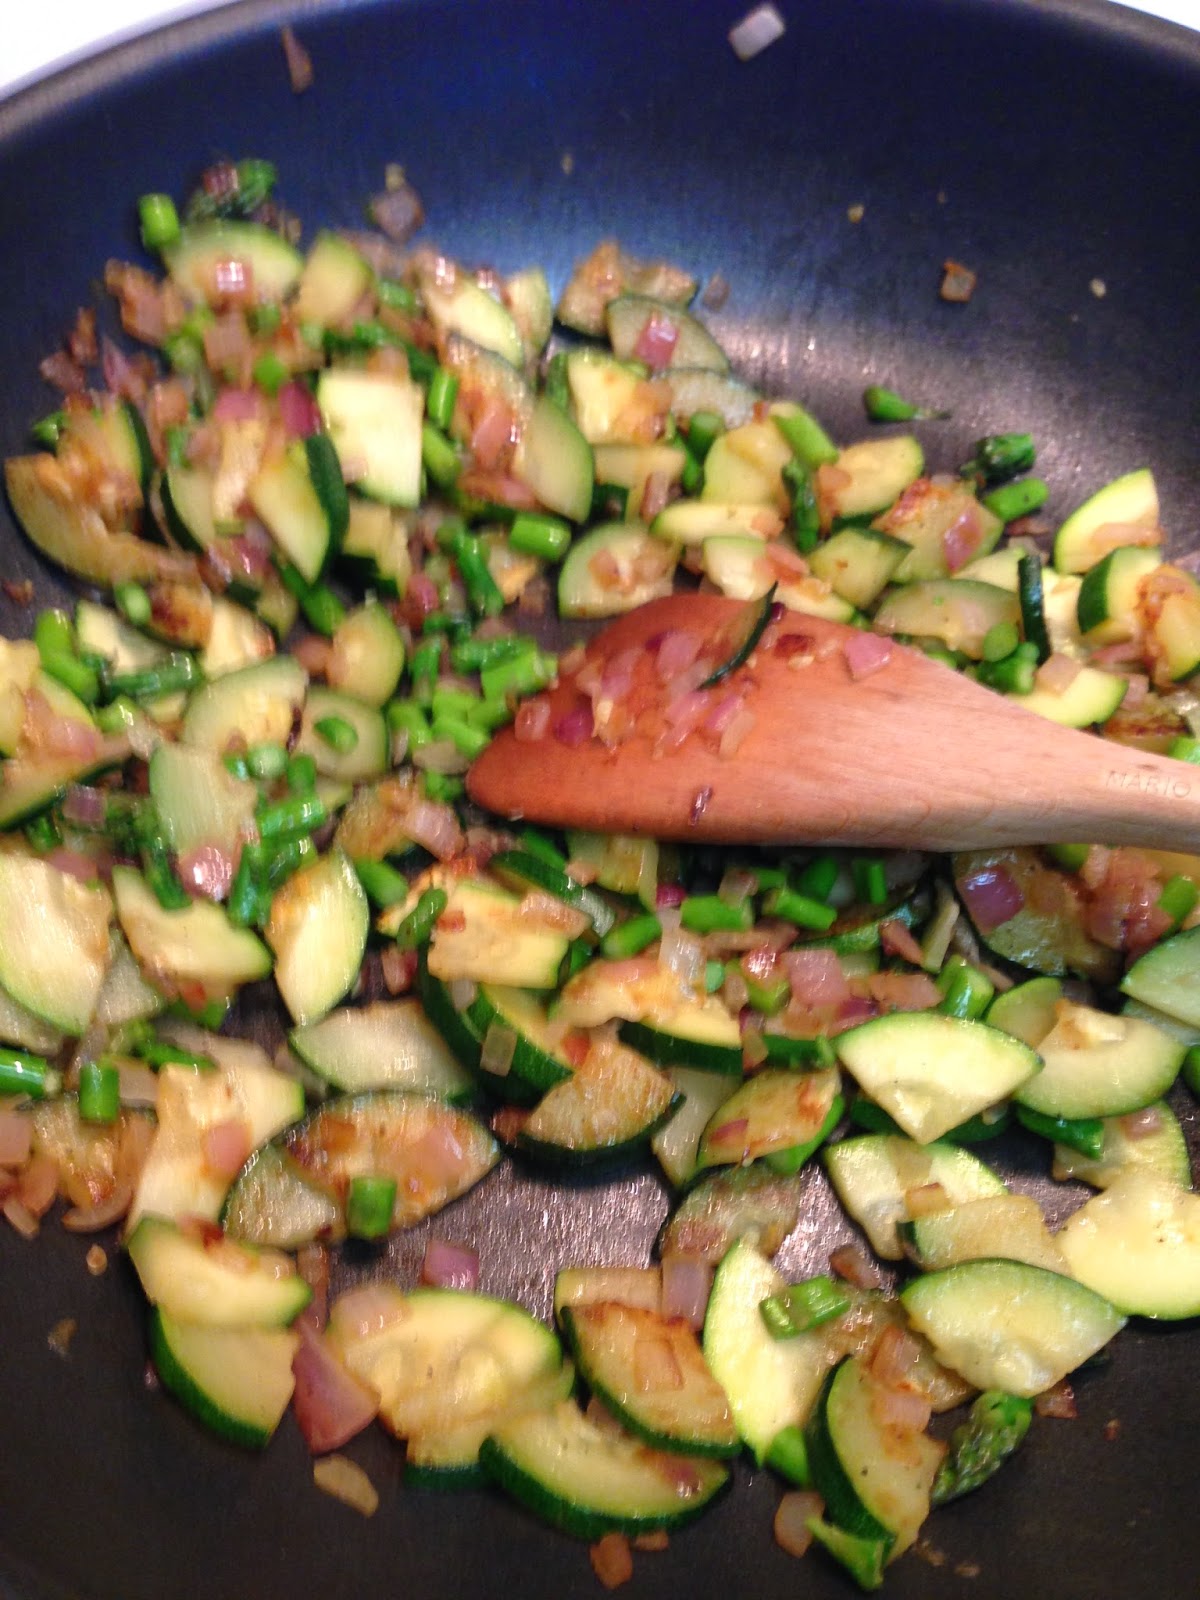
1 zucchini, cut into quarter moons
8 asparagus spears, cut into 1/2 inch chunks
1/2 pound cooked potatoes
4 tomatoes, deseeded and chopped
2 - 4 Tbsp fresh basil
9 eggs
1 cup milk
2 tsp dijon mustard
1 cup shredded swiss cheese, grated

Directions:

1. Preheat the oven to 425 degrees Fahrenheit.

2. Sauté the onions, garlic, zucchini and asparagus until they are tender, about ten minutes.


3. Add the cooked chopped potatoes, tomatoes, and basil.


4. In a bowl, beat the eggs, milk, mustard, salt, and pepper and immediately add to the pan.  Allow the mixture to heat and set for about 3 minutes.


5. Top with the cheese and bake in the oven until set, about 10 minutes. It will still be jiggly when it is done, but when you cut it, the eggs will not run into the cut line.  If you would like it to be crispy on top, broil it for about 2 minutes at then end of the cooking time.


6. Let sit for at least 5 minutes before serving.  This is also great at room temperature or even cold out of the fridge.  You can eat leftovers on top of toast for an open-faced fried egg sandwich-type thing.


7. Enjoy!

Monday, July 28, 2014

Zucchini Cakes with Lemon Dill Sauce


Well, after a great week out at the lake visiting with family and playing with my nieces, it's time to get serious and back to healthy eating.  As you can see from the photo above, the pickings at the grocery store on a Sunday night were pretty slim, but beggars can't be choosers, right?  These zucchini bites are full of flavour and make a great appetizer or light meal. If desired, serve them in lettuce cups with raw carrot and cucumber on top.  The lemon dill sauce can also be used as a salad dressing. We made these with the perogy bites and ate both for dinner.
Makes about 10 cakes.

Ingredients:

Zucchini Cakes:
3 zucchini, shredded
3/4 cup minute oats
2 cloves garlic, minced
1/2 cup fresh dill, chopped
1/4 cup fresh basil, chopped
1/4 cup pine nuts
1/2 onion, finely chopped
3/4 tsp dried Italian seasoning
2 Tbsp ground flax or chia seeds
1  egg, whisked
salt, pepper

1 Tbsp coconut oil

Lemon Dill Sauce
1 cup raw, unsalted cashews, soaked in water for 4 - 12 hours
1/2 cup water
zest and juice of one lemon
2 Tbsp fresh dill
1 Tbsp white wine vinegar
1 Tbsp extra virgin olive oil
1/2 tsp onion powder
1 - 2 cloves garlic
salt, pepper

Directions:

1. Toss the shredded zucchini in 1/2 tsp salt and let drain for about 30 minutes.  After 30 minutes, place zucchini on a couple of paper towels and wring out the excess moisture.


2. Preheat the oven to 425 degrees Fahrenheit.  Coat a baking tray with a thin layer of coconut oil.  Mix all the zucchini cake ingredients together.  Let chill in the fridge for at least 30 minutes.  

3. Using the lid of a narrow canning jar, pack the mixture into the lid to form small cakes.  Slide the cakes out of the lid and onto the baking tray.  Melt the remaining coconut oil and brush a thin coat on the top of each cake.  You could also put a sheet of parchment paper on the baking tray, which I would do next time.


4. Bake for about 25 minutes until golden brown.

5. Meanwhile, make the Lemon Dill Sauce by combining all the ingredients together in a small bullet-type blender, adding extra water bit by bit until desired consistency is reached.

6. When the zucchini cakes are baked, allow them to cool for a few minutes.  Then, serve them on top of the lettuce cups, if using.  Top with the Lemon Dill Sauce, carrots, and cucumbers. Enjoy!


Shopping Tip:
1. Don't go to the grocery store on Sunday night like I did!

Monday, December 2, 2013

Winter Pasta


I've previously posted my favourite Summer Fresh Pasta, so you are all familiar with one of the most popular dishes on our dinner table.  However, even favourites run their course and eventually everyone gets sick of them - cue the new winter fresh pasta.  One of the things I like most about the summer pasta is that it is quick and easy to make and includes lots of vegetables.  So, I took the same idea a just tweaked it a bit.

This recipe does include bacon instead of cheese, but it's only one slice for two people, so it's definitely in moderation.  Just enough to give the bacon flavour without overpowering everything.  This dish serves two people as a meal or four as a side dish.

Ingredients:

1 slice bacon, diced
1/8 tsp crushed red chile flakes
1 medium zucchini, cut in quarter moons
3 canned artichoke hearts, cut in twelfths (3 hearts out of one can, NOT 3 cans...)
6 cocktail tomatoes
2 cloves garlic
Fresh parmesan cheese, grated
salt, pepper
fresh basil, chopped (optional)

dried linguine or short pasta

Directions:

1. Put salted water on to boil in a large pot for the pasta.

2. Fry the bacon over medium high heat for about 4 minutes.  Do not add any extra oil to the pan, the bacon will release a lot of fat momentarily.

3. Add the chile flakes and the zucchini as well as a bit of salt and pepper.  Sauté for about 8 minutes.  Once the pasta water is boiling, add the pasta and cook according to directions.

4. When there are about three minutes left in the cooking time for the pasta, add the artichoke hearts, garlic, and tomatoes to the zucchini.  Add more salt and pepper to taste.  Sauté until the tomatoes have released their juices and created a sauce.


5. Drain the pasta and add it to the veggies.  Portion into bowls and top with parmesan cheese and fresh basil if available and desired.  Basil is really more of a summer herb, but sometimes you can find it in the winter.  Enjoy!


Shopping Tips:

1. It is really important to buy cocktail tomatoes.  First of all, in the winter, the other ones are disgusting and have no taste, and second of all, they have a lot of juice, which is what creates the sauce.  Other tomatoes, especially Roma tomatoes, have less juice and will leave you with a dry pasta.

2. Do yourself a favour and buy your bacon from the Farmers Market.  The taste difference is incredible, and once you've tried it, you will never go back.  I rarely use bacon, so I splurge on the good stuff, wrap it up in small quantities and freeze it.  For this recipe, you can cook it right from frozen, so there is no need to worry about defrosting it.

Options:

1. You could add kalamata olives to this is you wanted to take it even further into the Mediterranean.


If you've tried out any of these recipes, I'd love to hear what you think.  Please drop me a line in the comments section and let me know.  Thanks!

Monday, August 26, 2013

Mediterranean Quinoa Salad


Usually when I tell people that I like to cook healthy food, the first thing they ask is for ways to cook quinoa (pronounced keen-wa).  Common complaints are that it is soggy or that their husbands won't eat it.  My first suggestion for non-lovers of quinoa is to eat it cold, in salads, instead of hot and as a substitute for rice.  If you want to make your rice dishes healthier, use brown rice or wheat berries.  When quinoa is cold, it has a better texture and is not soggy.  Also, it tends to be a feature of the salad instead of the focus.  The reason that so many people are interested in eating quinoa is because it is the new fad food of the health world, even though it has been eaten by people in South America for thousands of years.  It is called the "mother grain" (even though it is actually a seed) because it provides all the necessary amino acids to make a complete protein.

On another note, I received a request from my sister-in-law to make something that contains Japanese long eggplant.  She is lucky enough to live in Los Angeles and grow fresh produce in her garden year round.  Apparently at the moment, she has a glut of these in her garden and needs inspiration.  Many of us in the northern parts are dealing with a similar predicament with zucchini and yellow summer squash.  Luckily for everyone, this recipe includes both of those vegetables as well as a couple of other gems from your summer garden.

This salad will serve at least three as a main course or six as a side.  It also saves really well, so you will be able to eat it for lunch the next day, too.

 Ingredients:

1/2 cup of quinoa
2 Tbsp extra virgin olive oil
2 Tbsp balsamic vinegar
1 medium zucchini
1 eggplant (Japanese or regular)
1 Tbsp Italian dried mixed herbs
1/2 pint of cherry tomatoes
1/4 cup feta cheese
Half an avocado
5 Kalamata olives, pitted
5 medium leaves of fresh basil

Directions:

1. I do not cook quinoa the way most people do.  Most people cook it like rice, but I find that makes it soggy.  Instead, I cook it kind of like pasta.  Put 1/2 cup of quinoa in a medium-sized pot with a pinch of salt and a bunch of water.  Bring the water to a boil, and then immediately lower it to a gentle simmer.  Simmer the quinoa for about 10 - 15 minutes until the little "tails" start to uncurl.  You will know it when you see it.  Taste the quinoa to make sure that it is not hard.  When it has finished cooking, drain it and transfer it to a large salad bowl.  Mix in 1 Tbsp of the olive oil and a pinch of salt. Spread the quinoa up the sides of the bowl so that it has more surface area to cool down.  This way, the excess moisture will evaporate away.  If you run it under cold water to cool it, it will end up soggy.

2. Cut the zucchini and the eggplant lengthwise into quarters and then slice into crescents.  If you are using regular eggplant, I usually don't use the very seedy part as it can be bitter and it gets soggy (apparently the goal of the day is to avoid sogginess!).  If you are using a Japanese eggplant, you can use the whole thing.  Sauté both in 1 Tbsp of olive oil with the Italian herbs and salt and pepper until they lose their crispiness - about 8 minutes.


3. Remove the zucchini/eggplant from the heat and add 2 Tbsp balsamic vinegar to the pan.  Let cool.

4. At this point, you can cut the tomatoes in half, crumble the feta cheese, cut the avocado, dice the olives, and chiffonade (cut) the basil.  To cut the avocado, run your knife around pit lengthwise and then twist both halves to separate them, just like you would a peach.  Save the half that has the pit in it in the fridge for another use (leave the pit in to prevent browning).  Cut the remaining half in half again and then peel the skin away.  If the skin does not peel easily, it is probably not ripe enough, although occassionally you will get one that just has thick brittle skin.

5. Add the cooled zucchini/eggplant to the bowl with the quinoa.


6. Top with the tomatoes and the feta.


7. Add the avocado cubes and the olive pieces.


8. Sprinkle the fresh basil on top.


9. Serve with additional balsamic vinegar, if necessary.  Enjoy!

Options:

1. The first time I made this salad, I did not include avocado.  Then, Scott decided that he wanted to cut dairy out of his diet, so he suggested adding avocado instead of the feta.  Quite honestly, I thought it wouldn't work, but it did.  Then, he decided that he wasn't cutting dairy out of his diet anymore, so we started to include both feta and avocado in the salad.  It's up to you.  Same with any other ingredient - if you don't like olives, leave them out!

2. You can add white beans or cubes of chicken to make this a more substantial meal.

3. You can serve this salad over lettuce greens for even more nutrition (I usually do).

4. You can serve this hot or cold.  If you serve it hot (maybe with chicken), just throw everything together before the quinoa and zucchini/eggplant cool.  You might not want to add the avocado if you are serving it hot.  You can always add the avocado the next day when you eat the leftovers cold.

5. You can make this in advance.  If you are making it in advance, put everything together except the tomatoes and the avocado - add them at the last minute.

Leftovers:

1. With the leftover avocado, you can add it to another salad, or you can make avocado toast: whole wheat toast, mayo, avocado, salt, and pepper - yum.  If you don't eat mayo, leave it out.

Shopping Tips:

1. When selecting an avocado, you want to pick one that is just a bit soft, like a peach.  If they are all hard as a rock, you will have to leave it on the counter for a few days to ripen.  The really hard ones can take 5 days.  Usually, they will ripen in two to three.

2. When picking an eggplant, make sure that it is firm and not soft.  If you are using a regular eggplant, the smaller ones have fewer seeds.  Also, the ones that are longer have fewer seeds.  The ones that are fat have more seeds.  If you get an older eggplant with more seeds, you can just cut them out, or you can get rid of the bitterness by cutting the eggplant in half, liberally salting each cut side, leaving the eggplant at room temperature for 30 minutes, and then rinsing the juice and seeds away.  You will then have to dry it with a paper towel.  Honestly, I have never needed to do this.  I just don't use the seedy part because I usually have more than enough eggplant for this recipe.

3. Quinoa can be white, red, or black.  It doesn't matter which one you use. However, some are pre-washed and some are not.  If you buy in bulk or the package does not say "pre-washed", make sure you rinse the quinoa thoroughly before using.  It is covered with natural saponin (which tastes like soap) so that the plant can protect itself from pests.

Whether you are getting your ingredients from your garden, the farmers market, or the grocery store, this salad is a great way to make the most of your seasonal produce!

Monday, August 12, 2013

Summer Fresh Pasta


This is my go-to meal for numerous reasons: it is quick, it is vegetarian, and it is chock full of fresh summer produce.  When your garden (or farmers market or grocery store) is brimming with juicy tomatoes, shiny zucchini, and fragrant basil, this dish will definitely make a regular appearance on your table.

One serving of pasta is only half a cup, but just like eating a sandwich with two pieces of bread, we often eat two servings of grains at one time.  One way to make pasta a more healthful dish is to make it a side instead of a main.  You can also pump it up with vegetables so that it is filling, nutritious, and has more volume - that's what this recipe does.  This will generously serve two as a main course or four as a side.

Ingredients:

2 Tbsp extra virgin olive oil
1/2 tsp red pepper flakes
1 medium zucchini or yellow summer squash
10 spears of asparagus
2 cloves garlic
6-7 cocktail tomatoes (I like Campari)
4 balls of bocconcini cheese
2 Tbsp fresh basil
Freshly grated parmesan cheese
2 cups of short pasta (like penne)
salt and pepper

Directions:

1. Put a pot of water with salt on to boil.  Chefs say that there should be enough salt in the pot so that it tastes like the sea.  If you are restricting your salt intake, use less.  Pot manufacturers say not to put the salt in the pot until it comes to a boil so that it does not pit the bottom of the pot, but I always forget if I don't put it in right away.  If you can remember to put the salt in after the water boils, power to you!

2. Cut the zucchini lengthwise into quarters and then slice each quarter into crescents.  Snap off the tough ends of the asparagus and then cut the spears into half-inch pieces.

3. Add the olive oil, red pepper flakes, zucchini, salt, and pepper to a large skillet and sauté over medium heat.

4. When the water boils, add the pasta to the pot and stir once.  At this point, add the asparagus to the skillet and continue to sauté.


5. Cut the tomatoes into eighths, mince the garlic, cut the bocconcini balls into eighths and chop the basil into thin strips (called chiffonade).  To chiffonade the basil, roll it up lengthwise like you are rolling a cigar (because everyone knows how to do that!) and then slice with your knife while you hold it tight with your other hand.

6. When there are two minutes left in the pasta cooking time, add the garlic and tomatoes to the skillet.  The tomatoes will lose their juices to create a sauce, but you don't want them to cook too much.  They should still hold their shape.


7. When the pasta has finished cooking, drain it in a colander. Take the skillet off the heat and sprinkle the bocconcini over top.  Be sure to spread it out so that it doesn't clump too much when it melts.

8. Add the cooked pasta on top and stir. You will probably have to add a bit more salt and pepper at this point.

9. Spoon each serving onto a plate.  Top with some of the fresh basil and shave some fresh parmesan over top.  Enjoy!

zu

Options:

1. Instead of asparagus, green beans would also work well.  Although not as healthy, this dish is also good without asparagus or green beans.

2. Whole wheat pasta is obviously more healthy, but many people cannot stand the cardboard taste it has at first.  If that is the case, you can use half whole wheat and half white pasta.  If one has a longer cooking time, put it in the pot first, and then add the one with the shorter cooking time after.  Over time, you can increase the amount of whole wheat and decrease the amount of white pasta.  Also, whole wheat pasta made with brown rice is usually more palatable than the pasta made with wheat.

3. It would also be very easy to make this dish vegan by leaving out the cheese.

Leftovers:

1. Served cold the next day, this makes a great pasta salad.  One of my friends actually prefers his as a salad and waits until the next day to eat it at all.

2. What do you do with the leftover bocconcini cheese?  Make a lettuce salad.  For the salad use mixed greens (not iceberg), tomatoes, bocconcini, avocado and basil.  Sprinkle extra virgin olive oil and balsamic vinegar over top.  Finish with a bit of salt and pepper to bring out the flavours of the produce. You can also add toasted pumpkin seeds, if you want.


Shopping Tips:

1. When buying bocconcini, do not buy the mini or pearl size - they are very rubbery.  Even better, fresh mozzarella is a superior product to bocconcini balls.

Even though there are a few steps to this recipe, it really is as simple as throwing a bunch of fresh seasonal produce into a pan and adding some pasta.  This is a great basic recipe to freestyle with, and after you become comfortable with the procedure, your imagination is the limit.  Just be sure to always include the tomatoes, or you will be left with a sauceless sauce!
UA-45633129-1