Monday, April 14, 2014

Ravishing Radishes


What is the most under-rated spring vegetable? The radish!  Radishes are detoxifying and great for digestion, they are high in vitamin C and low in calories, and they can even help with bug bites.  Why then are they so ignored?  In most homes, radishes show up on veggie trays or on top of green salads, and they are almost never on restaurant menus, but there are so many wonderful ways to eat them!  Did you know that radishes can be cooked or even roasted?  They can! In fact, cooking them reduces their pungency and gives them a more subtle flavour.  Although at this time of year, they are usually a little milder already.  What's even better is that you can even eat the radish greens.  They are tender like spinach and taste a bit like watercress.

Since I will not be posting next week, here are two ravishing radish recipes to hold you over.


Fennel and Radish Shrimp

Ingredients:

1 Tbsp extra virgin olive oil
1 Tbsp butter
1 large leek, washed, quartered, and sliced
1 large fennel bulb, chopped
1 bunch radishes, quartered and sliced

1 lb frozen shrimp, thawed and peeled
1 clove garlic, minced

juice of half a lemon
1 Tbsp light miso
1 tsp honey
salt pepper

fresh dill, chopped

Directions:

1. In a large pan, sauté the oil, butter, leek, salt, and pepper for 4 - 5 minutes.

2. Add the radishes and sauté for another 2 minutes.

3. Add the garlic and shrimp and sauté for 2 minutes.

4. Combine the lemon juice, honey, and miso into a paste.  Add to the pan and sauté for approximately 2 minutes or until the shrimp curl and turn pink.

5. Season with salt and pepper.  Remove from heat and top with fresh dill.


Options:

1. This can be eaten on its own or is great when tossed with a short pasta like bow tie.


Radishes on Rye
Spread a fresh piece of rye bread with butter, add sliced raw radishes, and top with flaked salt such as Maldon.  Even if you have very pungent radishes, this combination will remove some of the heat. As an alternative, add sliced raw radishes to your avocado toast from this previously posted recipe. Enjoy!
 

Monday, April 7, 2014

Dill Pickle Roasted Chickpeas


What do you do with your old pickle juice?  You probably throw it out, right?  Well, I usually use a bit of mine to make potato salad, but I too throw most of it away.  That is until I received the newly released cookbook, "Oh She Glows".  This new book by Canadian blogger Angela Lidden has received rave reviews, so when I saw a recipe for salt and vinegar roasted chickpeas, I immediately had the idea to use my leftover pickle juice instead of vinegar.

The greatest thing about this snack is that it is both healthy and delicious.  Try it out, and then check out Oh She Glows for the salt and vinegar version.

Serves two to four.

Ingredients:

1 19 oz can chickpeas, drained and rinsed
1 1/2 cups dill pickle juice
2 tsp extra virgin olive oil
1 1/2 tsp fine grained sea salt
1 tsp dried dill


Directions:

1. Preheat oven to 400 degrees Fahrenheit.

2. In a small pot, bring chickpeas and pickle juice to a boil for 30 seconds.  Remove from the heat, cover, and let sit for about 30 minutes.

3. Drain the chickpeas, drizzle with olive oil, spread on a parchment covered baking sheet, sprinkle with salt, and bake for 20 minutes.

4. After 20 minutes, shake the chickpeas on the sheet, sprinkle with the dried dill, and bake for another 20 minutes until charred and crunchy.  If they are at all soft, they are not done.

5. Let cool for about 5 minutes to further crisp up, and then enjoy!

Tips:

1. If you have any leftover, pop them back in the oven to get crisp again before eating.


Monday, March 31, 2014

Chipotle Orange Braised Pork


I love when I taste something new that blows my mind.  A combination of flavours that I've never tasted before yet seem so perfect together that I can't actually believe it is the first time I'm tasting them.  Since I've been experimenting with food for so long, that rarely happens to me anymore, but years ago when I tried the combination of orange and chipotle together for the first time, that was the reaction I had.

This is a big recipe, so it feeds many or is great as leftovers.  Actually, like most braises, it is better when made a day ahead of time so that the flavours have time to mingle and the fat can separate.  Pork shoulder is a very fatty meat, so you either need to separate it out in a fat separator, or cool it and skim the fat off the top.  Because this is a slow braise, it is better with cheaper, tougher cuts of meat (like shoulder).  Don't try to make it with pork loin in order to cut down on the fat content (Mom!).  This recipe takes at least five hours to cook, so it's great to make on a Sunday afternoon and then eat for leftovers during the week.

Serve with brown rice, farro, or other whole grain ( I tried it with both rice and farro, and it was definitely better with chewy farro).  It's even better when served with sweet cooked carrots.  Yield: Approximately 6 - 8 servings


Ingredients:

1 Tbsp extra virgin olive oil
1 onion, chopped
1 tsp salt

14 oz diced tomatoes
1/2 cup orange juice
1/4 cup honey
2 Tbsp red wine vinegar
2 Tbsp dijon mustard
2 tsp salt
2 cloves garlic, minced
1/2 -1 whole chipotle pepper, minced (depending on how hot you like it)
1 tsp cumin

1 4-5 pound pork shoulder

fresh cilantro, chopped

Directions:

1. Preheat the oven to 450 degrees Fahrenheit.

2. In a heavy dutch oven, sauté the onion in the oil with the salt until it is translucent.

3. While the onion is sautéing, combine the tomatoes, orange juice, honey, vinegar, mustard, salt, garlic, chipotle, and cumin in a small bowl.

4. Cut the string off the pork shoulder roast if it has it.  Trim the roast of any excess fat and cut into four quarters.

5. Push the onions to the side of the pot, and place the pork on the bottom of the pot. Cover with the liquid mixture.

6. Cover with a lid and place in the oven.  Turn the oven temperature down to 200 degrees Fahrenheit.

7. Cook for 5 - 6 hours (mine took 6, but I think my oven runs cool) without opening the oven door or until the meat falls apart when you pull on it with two forks. Separate the fat from the sauce or skim off any fat that is siting on the surface.


8. Serve on top of rice, farro, or other whole grain, and garnish with cilantro.  Enjoy!

Shopping Tips:

1. Chipotle peppers can be found in any grocery store by the taco ingredients.  They come in a very small can packed in adobe sauce.  You only need one, so you will have to buy way more than you need, but they can be frozen for a later use.  They are a great addition to salsa.

2. The handy dandy fat separator that you see pictured above was an awesome present from my brother and sister-in-law.  I'd been putting off buying one for years (even though they only cost about $10) because I kept telling myself that I didn't really need one, but trust me, they are soooooo handy!

This can be made at any time of the year, but is a great warmer on a chilly night.


Monday, March 24, 2014

Curry Roasted Cauliflower


My childhood memories of cauliflower are one of two things: raw florets dredged in dill dip from
a Tupperware veggie tray, or steamed with cheese sauce on top.  To some, these are fond memories, and to others, the reason for a hatred of the vegetable.  I happen to really like cauliflower, but then again, I also like brussels sprouts, cabbage, and rutabaga.

If you haven't tried roasted cauliflower yet, today is the day.  Roasting it at a high heat caramelizes the edges and changes the flavour profile completely.  This recipe goes one step further and adds curry powder for even greater complexity.

You can use either dill or cilantro.  I was intending to use cilantro, but my local grocery store tends to always be out of the one herb I am looking for.  If I want basil, they don't have it, but if I don't need it, they do have it.  Same goes for dill and thyme.  However, they seem to always have parsley and cilantro, so I thought I'd be safe.  Today, though, they did not have cilantro, but instead had bunches and bunches of fenugreek - an unusual herb used in Indian cooking.  I can only assume that someone made a pretty big mistake in the ordering....

Anyway, this can be made as a side or an appetizer.

Ingredients:

1 cup of plain yogurt
1/2 - 1 tsp garlic, crushed
1 tsp dijon mustard
2 Tbsp fresh dill, chopped
1 tsp capers, drained and finely chopped
salt, pepper

1 head of cauliflower, sliced
2 Tbsp extra virgin olive oil
1 tsp curry powder
salt, pepper

Directions:

1. Combine the yogurt, garlic, dijon, dill, caper, salt, and pepper and refrigerate for at least two hours to allow flavours to come together.

2. Preheat the oven to 450 degrees Fahrenheit.

3. Mix the oil and curry powder together.  Set aside.  Slice the cauliflower into discs and drizzle with the curry oil.  Mix well.


4. Place the cauliflower on a baking sheet and sprinkle with salt and pepper.

5. Bake the cauliflower for 15 minutes, turn, and bake for another 10 minutes.


6. Serve immediately with the yogurt dip on the side.


Shopping Tips:

1. Capers are the marinated buds of a Mediterranean flower although they taste nothing like it.  They are a great acidic addition to many dishes and are regularly found in tartar sauce.  They can be found in small jars in the pickle section of any grocery store.

Monday, March 17, 2014

Green Pea Crostini


One of my favourite restaurants in Edmonton, Corso 32, used to have a fava bean crostini on their menu that was to die for.  It's the kind of thing that would keep you going back even if that were the only thing on the menu, which, luckily, it isn't.  This is my take on that recipe since fava beans are not always the easiest things to find.  It may not be the time of year for fresh peas from the garden, but the sun is out, and it is almost time to start putting those pea seeds in the ground, so I thought that was good enough.  This recipe is almost as good with thawed frozen peas, so why not?

If you have a day-old baguette, slice it into thin rounds, brush with extra-virgin olive oil, and bake at 350 degrees Fahrenheit until brown and crispy.  When they come out of the oven, rub a piece of raw garlic over the toast. If you don't have a baguette, just use crostini from the store.

Ingredients:

12 garlic crostini

1 cup frozen peas, thawed
2 - 3 Tbsp good quality extra-virgin olive oil
2 Tbsp freshly grated parmesan cheese (plus extra for garnish)
4 basil leaves
1 Tbsp freshly squeezed lemon juice
2 Tbsp pine nuts
salt, pepper

Directions:

1. Toast the pine nuts in a dry pan on the stove or on a baking sheet in the oven for a couple of minutes, being very careful not to burn them (I always do!).

2. In a food processor, combine the peas, olive oil, parmesan, basil, and lemon juice until smooth.

3. Season the pea puree with salt and pepper to taste.

4. On top of each crostini, put a spoonful of pea puree, a few pine nuts, and some grated parmesan cheese.  Enjoy!


Shopping Tips:

1. The best, but most expensive, kind of parmesan cheese is parmegiano reggiano.  Do NOT use the parmesan that comes in the green can from the pasta aisle.  I'm not sure what that stuff is, but it is not cheese.

2. I use sweetlet or summer sweet peas for this recipe.  They are smaller and sweeter and have a more tender texture that the large green peas.

3. Pine nuts are expensive and go rancid quickly, so I keep them in the fridge.

The pea puree will keep in the fridge for several days, so it is really easy to make ahead of time - just don't put it on the toast until the last minute!

Monday, March 10, 2014

Sun Dried Tomato and Mung Bean Dip


I really like dips for a snack.  They are a quick and easy way to tie me over after work and until supper is ready.  It is often this snack that gives me the energy to make dinner instead of just devouring whatever is at hand when I open the fridge.

My standby as of late has been tzatziki, but with the main ingredient being yogurt, it is not that substantial, and I end up eating quite a few pretzel chips.  So, when I was looking for substitutes, I came across a recipe for a mung bean hummus.  I had never tried mung beans before, even though I had seen them in the store several times, because "mung" sounds gross and they are also a weird dark green colour.  The combination together just put me off.  But, then I heard that they are actually quite neutral tasting, so I decided to give them a try.  In addition, I decided that a cross between a hummus and a tzatziki would be the perfect combination of light and satisfying.  By the way, mung beans are a great source of protein, iron, and vitamin B6!

This recipe makes about 2 cups of dip.

Ingredients:

1/2 cup dried mung beans
1/2 cup plain Greek yogurt
1/3 cup sun dried tomatoes
a handful of fresh dill
1 Tbsp extra virgin olive oil
1 Tbsp lemon juice
1/2 tsp salt
1 clove garlic 

Directions:

1. Simmer mung beans in 3 cups of water for 40 - 50 minutes or until tender and starting to split.  Cool

2. In a small food processor, combine all ingredients.  You may need to add up to 1/4 cup of water to adjust the consistency.  It should not be too thick.

3. Refrigerate for several hours to allow flavours to come together. Enjoy!


Shopping Tips:

1. Mung beans are usually either sold in the bulk section or the "international foods" section of the grocery store.  Alternatively, you can find them at natural foods stores.

2. Sun dried tomatoes come in three forms: moist and ready to eat, dried, or packed in olive oil.  You can use any version in this recipe, but if you use the dried kind, you will need to reconstitute them in boiling water.  I used the moist and ready to eat kind.

Options:

1. If you can't find mung beans, you could use white beans instead.

2. Serve with dipping crackers or raw vegetables.

If you store this for more than a day, it may become thicker.  Just put it back in the food processor with a bit of water to loosen it up.


Monday, March 3, 2014

Portobello Tuna Melts


Okay, I promise, I do not eat tuna melts every week, although I did just realize that I posted a version of a tuna melt just two weeks ago...

I really like to include tuna in recipes because it is easily accessible (can be stored in the pantry), is inexpensive, and makes it easy to include a serving of fish in my week.  For anyone who is gluten-free, this is a great way to have a tuna melt as there is no bread in the recipe.  I often make this when I'm looking to eat a bit lighter, which usually occurs right after Christmas or as the weather starts to warm up and I realize that the over-sized sweaters are going to have to be retired soon.  Seeing how it's March and the temperature this weekend was below -40 degrees celsius, I guess I also make it when I'm looking for something quick and easy.

This recipe serves two people.

Ingredients:

2 portobello mushrooms
extra virgin olive oil
1 can chunked light tuna, drained
2 Tbsp mayo (I use reduced fat veganaise)
1 tsp dijon mustard
2 Tbsp fresh dill
1 handful of baby kale or spinach
1 small tomato
1/4 cup cheddar or gruyere cheese, grated
salt, pepper

Directions:

1. Preheat the oven to 500 degrees Fahrenheit.

2. Take out the stem of the mushrooms, and use a spoon to scrape out the gills.


3. Place the mushrooms on a baking sheet and brush with oil.  Bake for 10 minutes, turning halfway through.

4. While the mushrooms are baking, in a medium-sized bowl, mix together tuna, mayo, dijon, dill, kale, salt, and pepper.


5. When the mushrooms are tender, fill each cap with the tuna mixture and top with tomatoes and cheese.

6. Broil for about 5 minutes or until the cheese is brown and bubbling.  Enjoy!


Shopping Tips

1. Portobello mushrooms are the really big ones.  They can now be found in all grocery stores.

2. Some tunas are more pungent than others.  I like the light taste of light tuna.

These tuna melts are great served with salad.

Monday, February 24, 2014

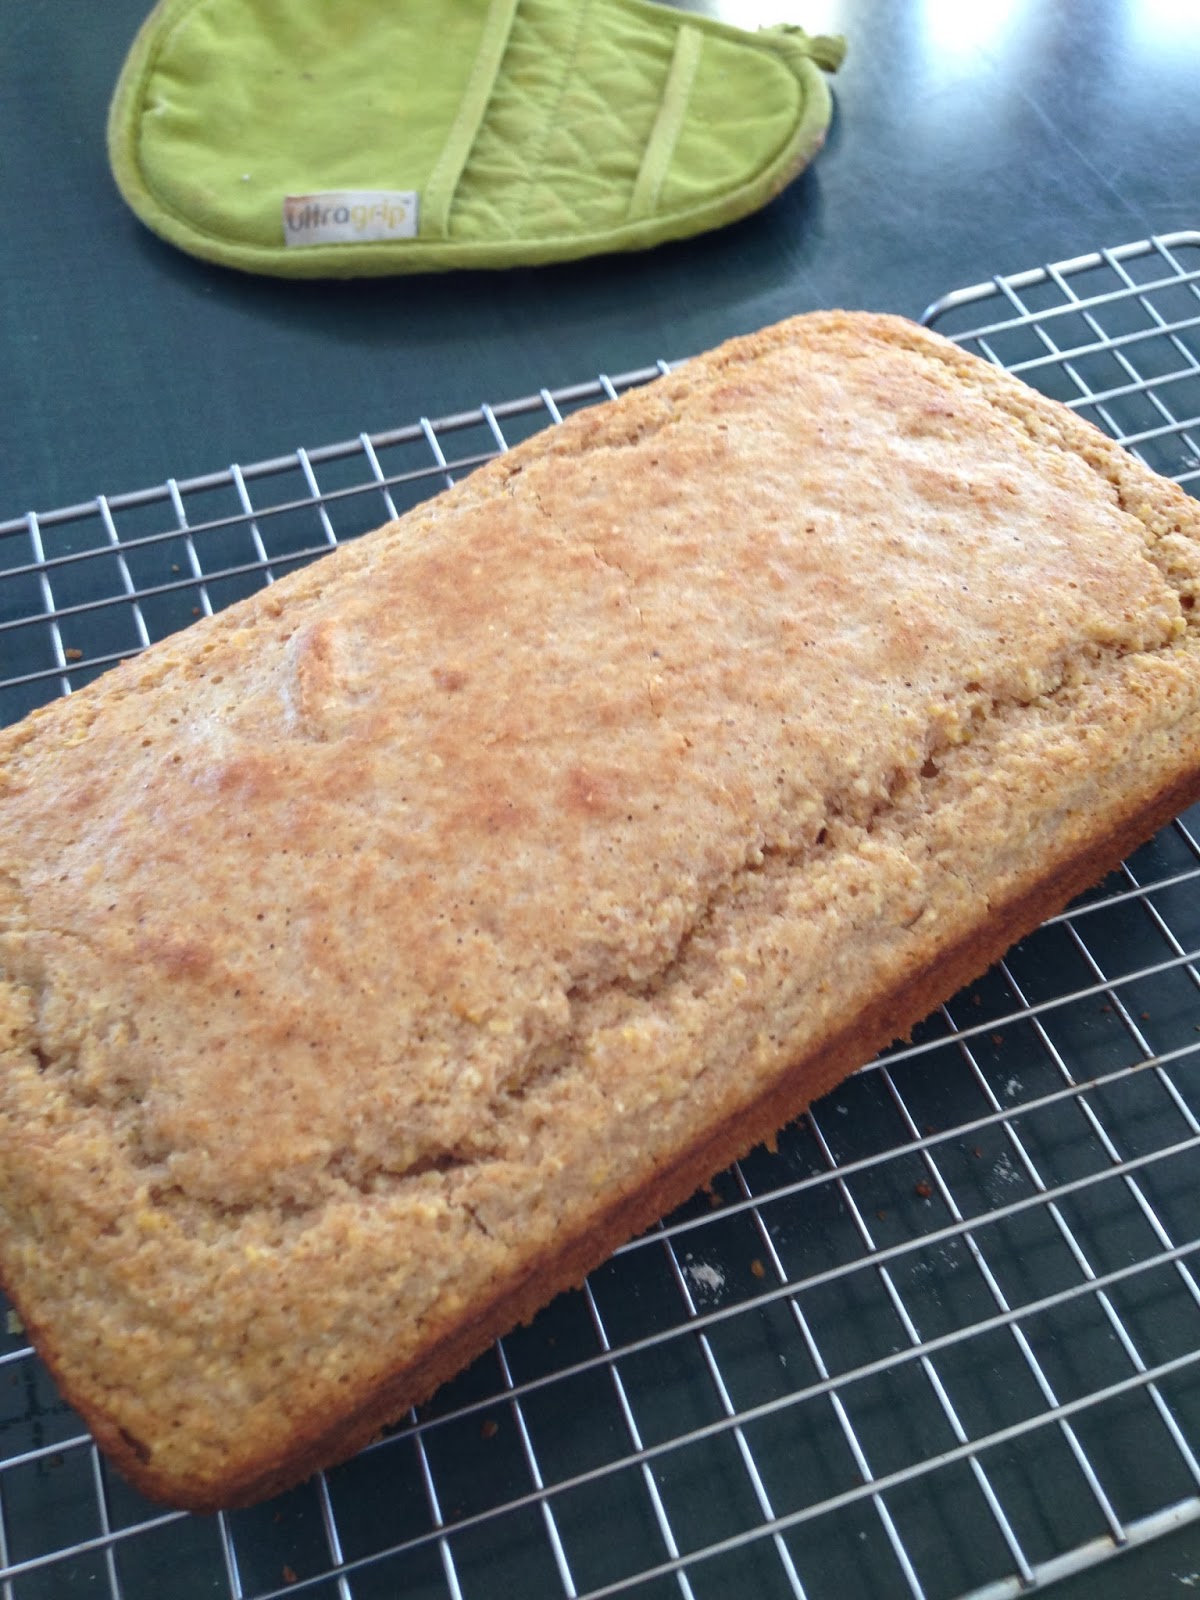
Superfast Cornbread


Some friends of mine spent two years teaching in Malawi.  While there, they came across an old Peace Corps cookbook put together by various expats living abroad.  Some of my best bread recipes come from that book.  This recipe is a version of one that was passed on to me from that book.

The best thing about this recipe is that it is so quick and easy that it can be made on a weeknight.  Alternatively, it freezes very well, so it can be made ahead of time and then thawed when needed.  I slice it and then freeze two-piece portions in sandwich bags so that I can easily pull out what I need for a weeknight supper.  Leftover chilli with a couple of pieces of cornbread makes a quick and filling meal.

Makes one loaf or one 8x8" pan.

Ingredients:

3/4 cup cornmeal
1 1/4 cups milk

1 egg
1/4 cup organic canola oil

1 cup wholegrain spelt flour
1/3 cup coconut sugar
1 Tbsp baking soda
2/3 tsp salt

Directions:

1. Preheat the oven to 400 degrees Fahrenheit.

2.  In a small bowl, mix the cornmeal and the milk together and let sit for 10 minutes.  This step is the most important one because it prevents your cornbread from being too crunchy.

3. Mix the oil and egg together and add to the cornmeal and milk.


4. In a medium bowl, mix together the dry ingredients.

5. Add the wet ingredients to the dry ingredients and stir.

5. Transfer the batter to a loaf pan or square pan.  Bake for 30 minutes.  Let cool for 5 minutes.  Transfer to a rack to cool completely.


Options: 

1. The original recipe calls for white flour instead of spelt flour and white sugar instead of coconut sugar.  It will rise higher if you use white flour, but will be healthier if you use whole flour.  You could always use a combination for the best of both worlds.

2. You can add 1/2 cup thawed corn kernels and/or diced jalapeño pepper for more kick.

3. For a vegan version, substitute almond or soy milk and use 1 tbsp ground chia seeds mixed with warm water (let stand for 10 minutes) instead of the egg.

Enjoy!


Monday, February 17, 2014

Tuna Melt Casserole


A long time ago, Scott decided to make supper from the recipe on the back of the condensed mushroom soup can.  Surprisingly, the six-ingredient meal was quite tasty, and as I've previously said, I'm a sucker for a good casserole.  Wanting to make the dish a bit healthier so that we didn't have to use the condensed soup, this recipe was born.  It is even more flavourful and delicious than the original - go figure...

Serves 4 - 6.


Ingredients:

340 grams bowtie pasta

2 cloves garlic
3 leeks
8 ounces mushrooms
1 Tbsp olive oil
salt, pepper

300 grams light ricotta cheese
1 cup Greek yogurt
1/2 cup milk
2 eggs
1/4 cup fresh dill
salt, pepper

1 cup frozen corn

2 cans flaked tuna in water, drained

1 cup grated cheese of your choice (I used marble).


Directions:

1. Preheat oven to 350 degrees Fahrenheit.

2. Boil the pasta in salted water for one minute less than the package directions indicate.  When done, drain and set aside

3. Pulse garlic and leeks in a food processor (or chop finely by hand).  Sauté in olive oil for about 4 minutes in a large frying pan.

4. Meanwhile, pulse mushrooms in food processor (or chop finely by hand) until small bits.

5. Add mushrooms to the pan and continue to sauté for 8 - 10 more minutes.

6. Process the ricotta, yogurt, milk, eggs, dill, salt and pepper in the food processor (or beat by hand) until combined (it will be quite runny).

7. Remove the onion and leek mixture from the heat.  Add the frozen corn to the pan and combine. Then, add the drained, flaked tuna. Then, add the cooked and drained pasta and stir.  Finally, add the sauce and combine thoroughly.


8. Pour the pasta mixture into a lightly greased 9 x 13" pan.  Top with grated cheese.  Bake for 30 minutes and then broil for 4 minutes.  Enjoy!

Shopping

1. Buy high quality tuna (usually the one that is the most expensive).  If it smells like cat food, it will taste like cat food.

2. Buy whole mushrooms as they are cheaper and easier to clean.  A lot of sliced mushrooms still have dirt on them.

3. Make sure to clean the leeks thoroughly by running them under cold water after cutting them in half lengthwise.  Hold them top side down when you do this so that the dirt runs out of the leek.

4. Ricotta cheese is sold in a tub in the deli section.

Options:

1. You can sauté the garlic, leeks, and mushrooms ahead of time.  You can even do a double batch  and freeze the extras for next time.  This will save you a lot of time and clean up the next time you want to make this.

2. You could also make this with leftover chicken.

Monday, February 10, 2014

Creamy Chard and Mushrooms on Toast with Poached Egg


Several years ago, I took a leave of absence from work to go to Vancouver and get my culinary arts diploma.  Why?  I'm not really sure, but it felt like the right thing to do at the time!  During the program, we had to do a black box test.  We were told a few ingredients ahead of time, but we didn't know which ones we would get.  All I knew was that one of them could be swiss chard.  In the past, I had sautéed it with mushrooms and balsamic vinegar as an accompaniment to my steak, but I wasn't sure how I would use it in other preparations.

The weekend before the exam, a bunch of us from class were at the house of another student when we decided to make brunch.  Each person grabbed a bunch of ingredients and made something for the communal table.  Since no one had taken the mushrooms from the fridge, and there was fresh chard in the garden, I decided to whip together my good old stand-by.  Since it was brunch, there was toast, and someone had soft-boiled a bunch of eggs.  It was then that kismet happened on my plate.  As I piled some of the chard and mushrooms onto my egg-soaked toast, the perfect medley occurred, and it was then that I knew what I would do for my black box if swiss chard were to appear.

As fate would have it, swiss chard did appear, and I invented a much more sophisticated version of that Sunday brunch for top marks.  I have since created this version, which is much more do-able for a quick brunch or light supper.

This recipe serves 2, but could easily be doubled to serve 4.


Ingredients:

4 pieces of crusty toast

4 poached eggs

1Tbsp olive oil
1 leek, washed, quartered, and chopped
8 oz of mushrooms, washed and sliced
2 large swiss chard leaves
2 cloves garlic, crushed
1/2 tsp dried Italian herbs
2 Tbsp balsamic vinegar
1/3 cup cream
salt, pepper
pinch of cayenne pepper

1. Remove the stems from the chard and chop finely.  In a large pan on medium-high heat, sauté the chard stems, leeks, Italian seasoning, and mushrooms in the oil until mushrooms are brown and stems are tender - about 8 minutes.


2. Put another shallow pan on the stove and fill with water, salt, and a splash of white vinegar (if desired to help keep the egg whites together).

2. Slice the chard leaves in ribbons and add then with the garlic to the pan.  Sauté on medium low until leaves are wilted and pan is dry.  Season with salt and pepper.

3. Break an egg into a small cup being careful not to break the yolk.  If the yolk breaks, save it for another use and break a new one.  When the water is simmering, slowly and carefully pour the egg into the water being careful not to break the yolk.  Add the remaining eggs in the same way.  Set the timer for 4 minutes.


4. While the eggs are simmering, put the toast down.

5. When there is about 2 minutes left in the cooking time for the eggs, add the balsamic to the chard mixture and cook until the pan is almost dry.  Add the cream, turn the heat to low and adjust the seasoning.

6. When the toast pops, put two pieces on each plate, top with the chard mixture, and an egg on each  piece of toast.  Lightly sprinkle each egg with salt, pepper, and a touch of cayenne pepper.  Enjoy immediately.


Shopping Tips:

1. Swiss chard can be red, white, or yellow at the stem.  Any one will work as there is little difference in the taste.  For more detailed instructions and pictures about using it, refer to the instructions for kale on this recipe.

2. For more information about washing and cutting leeks, refer to this recipe.

3. Go here for another recipe that uses Italian herbs and balsamic vinegar.

4. You can use whatever cream you prefer: full fat or half and half.

Options:

1. Instead of the leeks, you could use shallots or finely sliced onions (if you have to).

2. To the mushrooms, you could add diced bell peppers.

3. Instead of poaching the eggs, you could soft-boil them for 5 minutes in boiling water.

4. Instead of toast, you could put the chard mixture and the egg on a bed of whole grains.

5. Layering fresh tomatoes between the chard and the egg tastes great too.

6. As stated above, the chard mixture is great on its own with steak.


Monday, February 3, 2014

Spinach, Cauliflower, and Feta Quinoa Cakes


I'm always looking for new and delicious ways to incorporate grains into my meals.  Whole grains are delicious and nutritious, but rarely is a pile of whole grains on the side of the plate appetizing or appealing.  These quinoa cakes are a great way to add a new and exciting food to your plate as a side dish or even on top of a salad for a bit more substance.  They can be made ahead of time and reheated or eaten at room temperature as a filling snack-on-the-go.  Scott likes them plain with Dijon mustard on top.

This recipe makes about 10 - 11 cakes.


Ingredients:

1 cup dry quinoa
1 1/2 cups cauliflower florets
1 large handful of spinach, washed and chopped
2 cloves garlic, minced
2 green onions, thinly sliced
2 Tbsp basil, chopped
4 eggs
1 cup crumbled feta cheese (use garlic and herb if you like)
1/4 cup flour of your choice
1 tsp salt
pepper, to taste
2 Tbsp coconut oil or organic canola oil

Directions:

1. Cook the quinoa by simmering in salted water on low heat for about 15 minutes.  Drain and cool to room temperature.

2. Chop the cauliflower into rice-sized pieces or pulse in a food processor.


3. To the cooled quinoa, add the cauliflower and remaining ingredients except for the oil.


4. Place in the refrigerator for at least 30 minutes to set.

5. Heat 1Tbsp of the oil in a large frying pan.  Form the patties either by hand or using the lid of a wide-mouthed canning jar (this method makes perfect-sized cakes, and the cakes can be slid off the lid and into the pan).  Fry the patties in batches on a medium heat.  Fry for 3 - 4 minutes on one side and 2 - 3 minutes on the other side or until golden brown. Use the remaining tablespoon of oil for the second batch of cakes.


6. When patties are cooked, transfer them to a paper towel lined plate.  If you are saving them for later, put another paper towel overtop and cover with plastic wrap.  Enjoy!

How to ensure perfectly formed cakes: 1) pack the canning lid full, 2) fry until crispy on the bottom (you will see brown around the edges), 3) do not turn them more than once, 4) use coconut oil which doesn't absorb into the cakes as quickly.


Shopping Tips:

1. Quinoa may come pre-washed or not - check the side of the bag.  If it is not washed, it is important to rinse thoroughly before cooking to get the natural saponin (soap-taste) off.

2. Cauliflower comes in orange, purple, green, and white.  Often these varieties are available in the summer at the farmers market.  If you can find them, orange, purple, and green are healthier and add an interesting contrast to the patties.

Options:

1. As previously stated, these can be eaten warm or cold.

2. Kale can be easily substituted for the spinach.


Monday, January 20, 2014

Slow Cooker Short Ribs - Asian Style


The slightly weird looking vegetable above is a Chinese radish called a daikon.  It is crisp and refreshing and can be eaten raw or cooked.  It is slightly more mild than a regular red radish.  In this recipe, the pickled carrot and daikon salad adds a fresh and crispy crunch to the tender and succulent short ribs.

This recipe is adapted from the Williams Sonoma New Slow Cooker book.  I made this recipe once for just Scott and I without the salad, and it was still very good, so if you are in a hurry, just throw everything in the slow cooker and forget about it.  The second time I made it, my brother and sister-in-law were visiting from L.A, so I thought I should do it right and include the salad.  It was met by rave reviews from all (even though I should have cooked it for a bit longer that time since I had made a bigger batch).

The portions here will serve four people when served over rice.

Ingredients:

3 kg beef short ribs (about 8 small ones)
salt and pepper
3/4 tsp Chinese five-spice powder
1/4 cup hoisin sauce
1/4 cup organic ketchup
2 Tbsp rice vinegar
2 Tbsp soy sauce
1 Tbsp Asian fish sauce
1 Tbsp honey
1 small onion, chopped
1 Tbsp fresh ginger, minced
5 cloves garlic, smashed

2 carrots
1 daikon
rice wine vinegar
organic canola oil
salt
sugar

Directions:

1. Preheat the broiler on high.

2. Place the ribs bone-side down on a rack over a tray.  Season meat with salt, pepper, and five-spice powder.

3. Broil for 8 minutes.  Turn and broil for another 8 minutes.


4. Mix the hoisin, ketchup, vinegar, soy sauce, fish sauce, honey, onion, ginger, and garlic in a 6 quart slow cooker.

5. Add the broiled ribs to the slow cooker and turn to coat in the sauce.  Cover with the lid and cook on low for at least 6 hours.  Ribs will be very tender and falling off the bone when done.

6. While the ribs are cooking, finely slice the carrot and daikon in to thin julienned strips.  Toss with a bit of rice vinegar, canola oil, a pinch of salt, and a pinch of sugar.  Let marinate in the fridge until the ribs are done.

7. When the ribs are done, serve them with rice.  Pour the cooking liquid into another container and let sit for five minutes.  Skim off the fat from the top, discard, and then pour the sauce over the ribs and rice.  Top off with the drained carrot/daikon salad. Enjoy!


Shopping Tips:

1. The hoisin and fish sauce can be found in the Asian section of a regular grocery store.

2. Daikon can be found in some grocery stores and in Asian markets (although it may be called lo bok).  If you can't find it, leave it out.  

Options:

1. The first time I made this, I didn't make the salad part. It was very good, so if you want an easier recipe, just make the ribs.

2. As with most things, this is even better the next day.  I like to cook it in the slow cooker on Sunday, and then I make another meal for dinner.  That way, I can save the ribs for meals later in the week.  I just separate the meat from the sauce and store them separately in the fridge.  That way the fat rises to the top of the sauce and I can skim it off the next day.  Then I mix them together again when I reheat them.  This meal does not suffer from being reheated in the microwave.  Just make fresh rice.  (Mom, do NOT mix the rice with the sauce and save it for leftovers!). 
UA-45633129-1