Monday, July 28, 2014

Zucchini Cakes with Lemon Dill Sauce


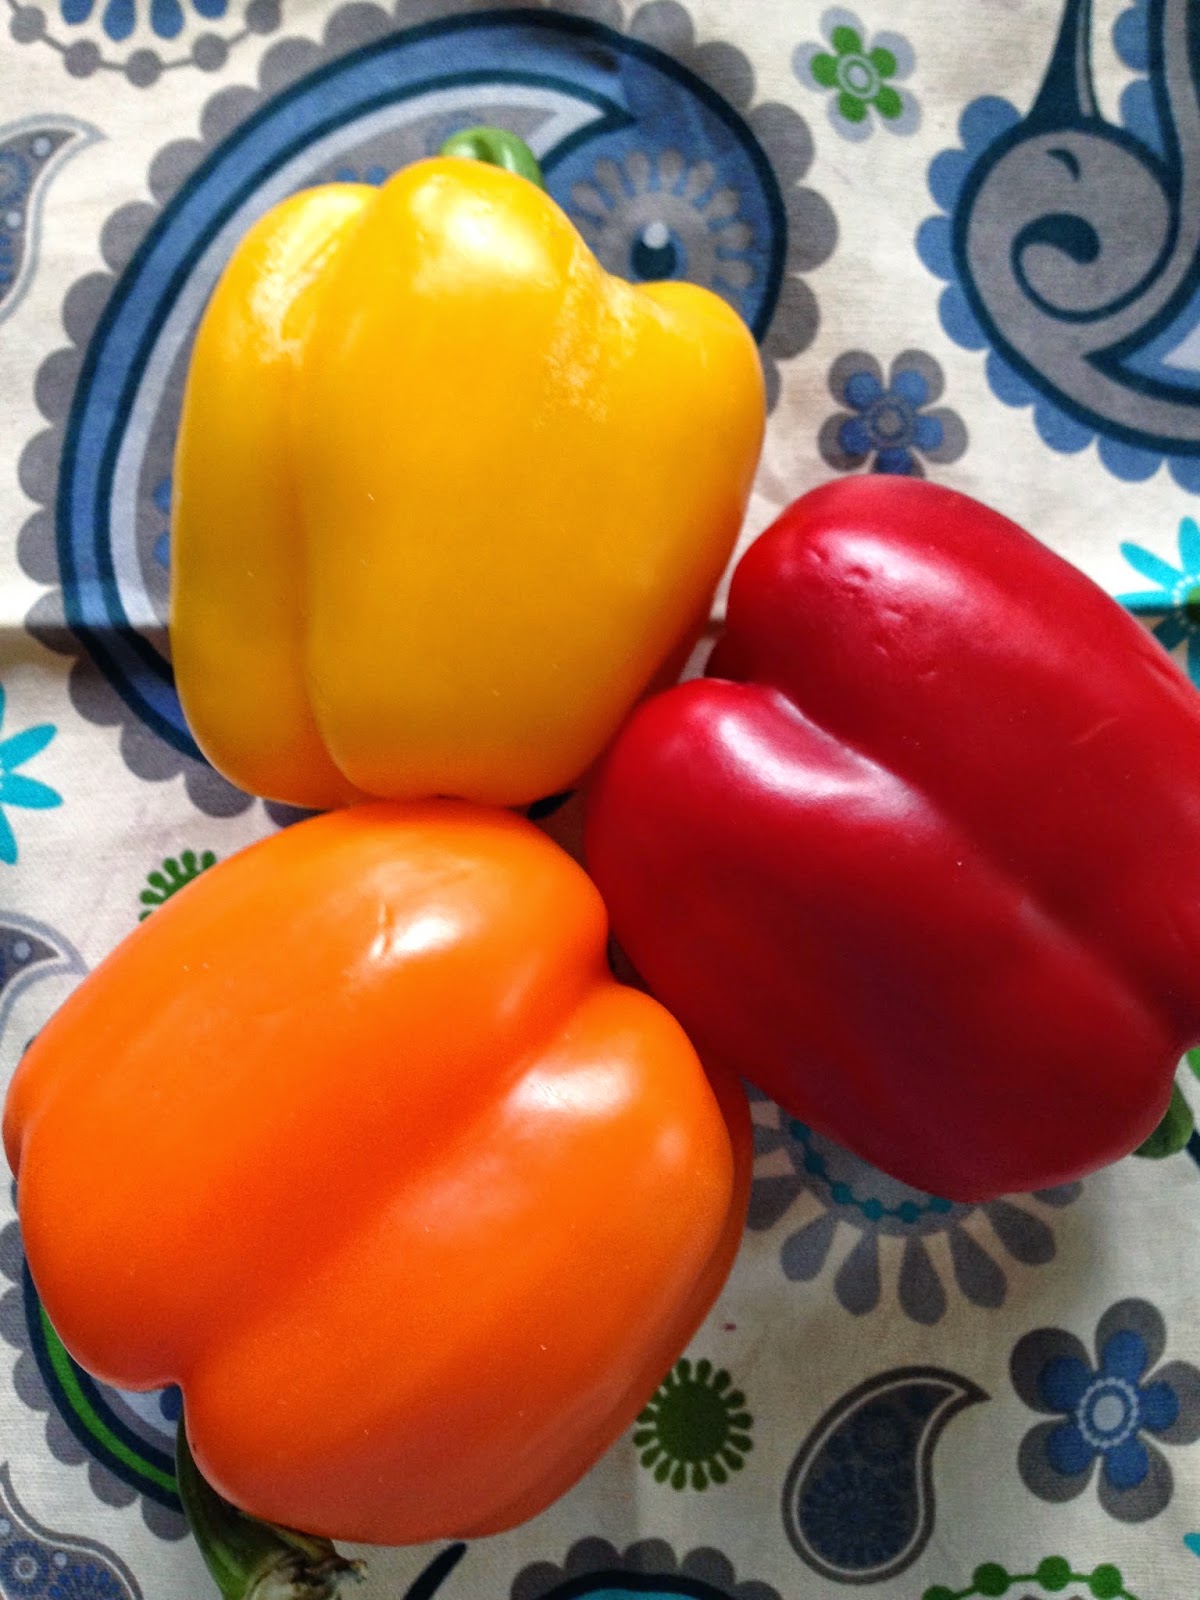
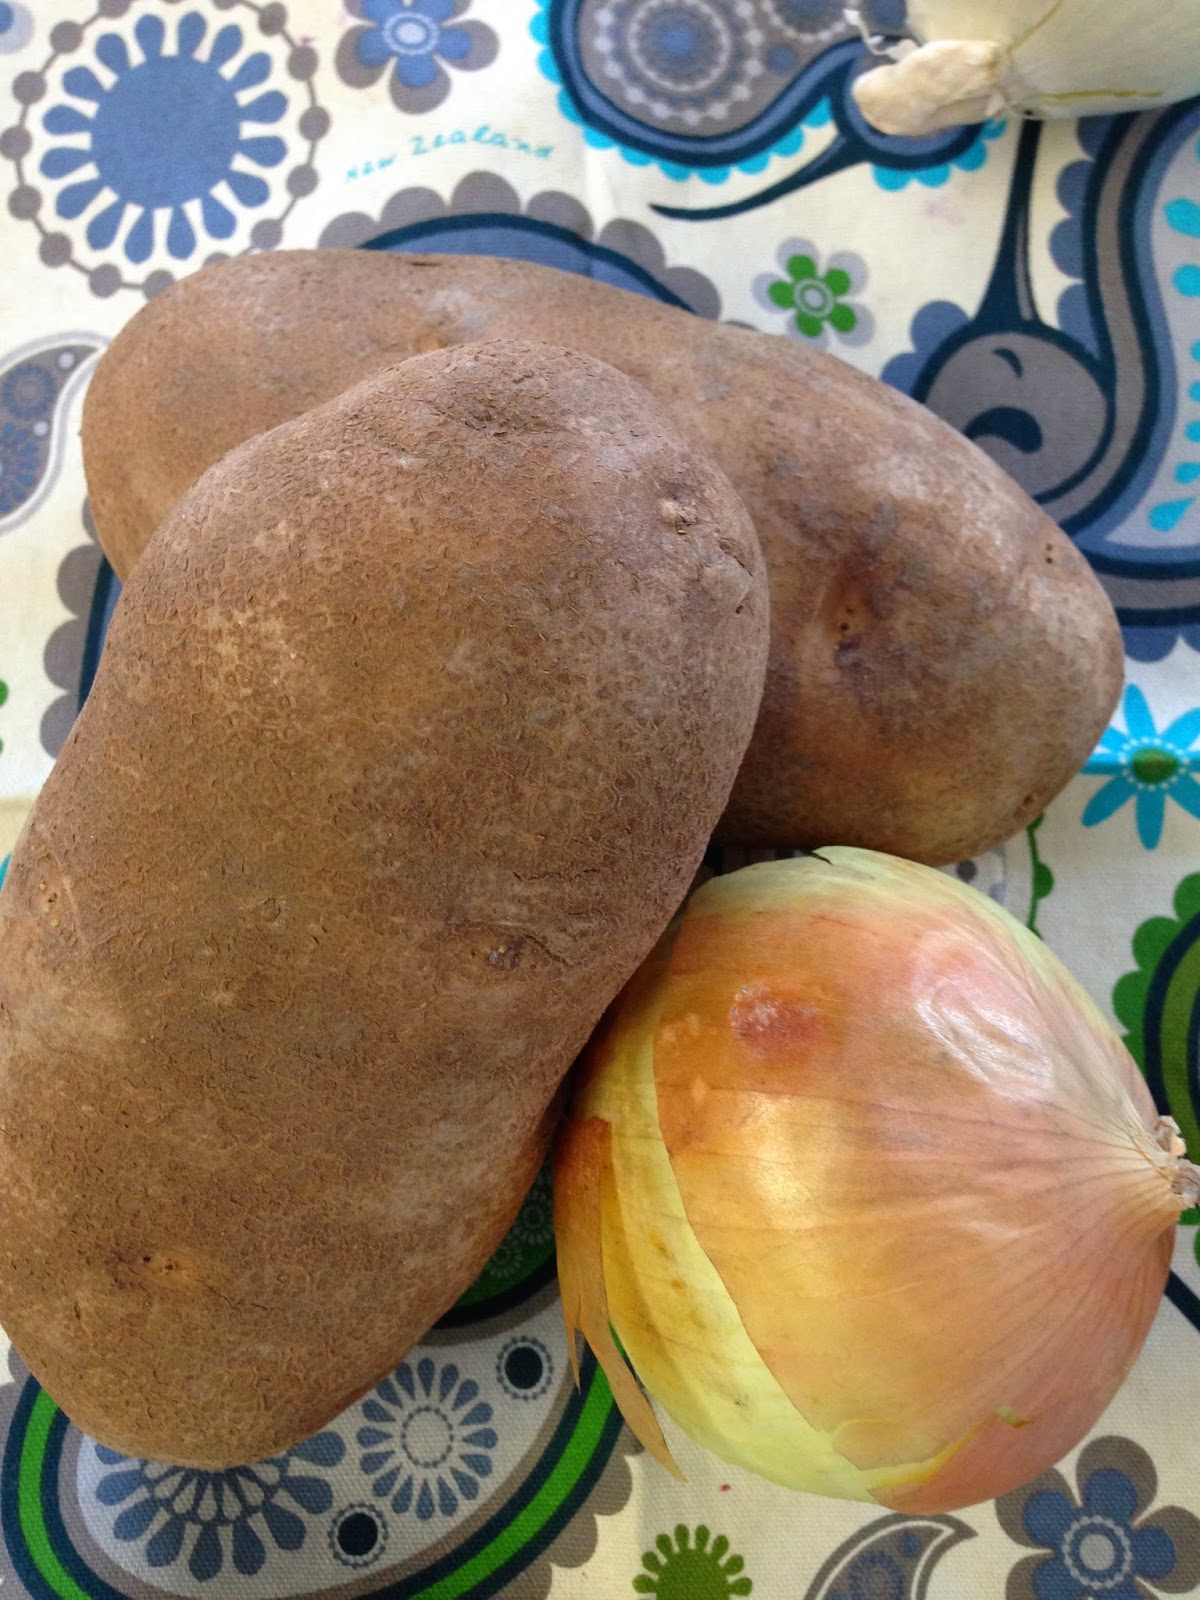
Well, after a great week out at the lake visiting with family and playing with my nieces, it's time to get serious and back to healthy eating.  As you can see from the photo above, the pickings at the grocery store on a Sunday night were pretty slim, but beggars can't be choosers, right?  These zucchini bites are full of flavour and make a great appetizer or light meal. If desired, serve them in lettuce cups with raw carrot and cucumber on top.  The lemon dill sauce can also be used as a salad dressing. We made these with the perogy bites and ate both for dinner.
Makes about 10 cakes.

Ingredients:

Zucchini Cakes:
3 zucchini, shredded
3/4 cup minute oats
2 cloves garlic, minced
1/2 cup fresh dill, chopped
1/4 cup fresh basil, chopped
1/4 cup pine nuts
1/2 onion, finely chopped
3/4 tsp dried Italian seasoning
2 Tbsp ground flax or chia seeds
1  egg, whisked
salt, pepper

1 Tbsp coconut oil

Lemon Dill Sauce
1 cup raw, unsalted cashews, soaked in water for 4 - 12 hours
1/2 cup water
zest and juice of one lemon
2 Tbsp fresh dill
1 Tbsp white wine vinegar
1 Tbsp extra virgin olive oil
1/2 tsp onion powder
1 - 2 cloves garlic
salt, pepper

Directions:

1. Toss the shredded zucchini in 1/2 tsp salt and let drain for about 30 minutes.  After 30 minutes, place zucchini on a couple of paper towels and wring out the excess moisture.


2. Preheat the oven to 425 degrees Fahrenheit.  Coat a baking tray with a thin layer of coconut oil.  Mix all the zucchini cake ingredients together.  Let chill in the fridge for at least 30 minutes.  

3. Using the lid of a narrow canning jar, pack the mixture into the lid to form small cakes.  Slide the cakes out of the lid and onto the baking tray.  Melt the remaining coconut oil and brush a thin coat on the top of each cake.  You could also put a sheet of parchment paper on the baking tray, which I would do next time.


4. Bake for about 25 minutes until golden brown.

5. Meanwhile, make the Lemon Dill Sauce by combining all the ingredients together in a small bullet-type blender, adding extra water bit by bit until desired consistency is reached.

6. When the zucchini cakes are baked, allow them to cool for a few minutes.  Then, serve them on top of the lettuce cups, if using.  Top with the Lemon Dill Sauce, carrots, and cucumbers. Enjoy!


Shopping Tip:
1. Don't go to the grocery store on Sunday night like I did!

Monday, July 21, 2014

Exhibit Guacamole


So, the final art exhibit was on Friday (although it is on display for the next two weeks), and the theme that I explored was "Our Changing Relationship with Food".  No big surprise there, right?  Anyway, one of the assignments was to make an artist book, which is a work of art in the form of a book.  They are usually one of a kind works.  For my artist book, I made an avocado from clay and documented the history of the cultivation of avocados through altered maps.  So, of course it was only natural that I was automatically nominated to bring the guacamole to the party!  Luckily it turned out to be a hit since I was also named the "resident foodie" of the group.  The second avocado in the picture above is my version of a seedless avocado of the future.  One of the ideas I explored was real food versus fake food.  You will notice the difference between the real guacamole and the fake guacamole chips in picture below.  All in all, the course was a great experience, and I met a lot of great people, but I am definitely glad to have another class completed and under my belt - only one more to go!

I'm not sure how many this serves since it was all gone before I even got any, but I'd say it made about 4 cups.

Ingredients:

5 - 6 ripe avocados, finely chopped
1 tomato, seeds removed and diced
3 Tbsp red onion, finely diced, soaked in cold water for 10 minutes, and drained
2 Tbsp fresh cilantro, finely chopped
1/4 - 1/2 jalapeño, finely diced
juice of one lime
1/3 tsp sea salt

Directions:

1. Basically, just mix everything together in a bowl and adjust the salt and lime to taste.  I stir it around and mash it a bit with a spoon so that it is a bit mashed but still chunky.  I like to keep it chunky so that it does not look like the slop from the store.  It's best to do the mashing before adding the tomatoes...

2. In order to remove the seeds from the tomato, cut it into six to eight sections (depending on how big it is) and stick your thumb in the seed part (over the sink) to push them out.

3. I soak the onions in cold water to lessen the bite, but that is a personal preference of mine.

4. Be careful not to over-salt the guacamole because the tortillas that you will most likely be eating it with are also salted.  Therefore, taste the guacamole on a tortilla, not by itself.  Enjoy!!!


Shopping Tips:

1. Ripe avocados are hard to find in the store, and if they are ripe, they are usually bruised from being poked too much.  Buy your avocados two to three days before you need them, allow them to ripen on the counter, and then put them in the fridge when they are ready.  Putting them in the fridge will hold them at that stage of ripeness for several days.  For that reason, I always have a couple ready to go.

2. There are many strategies and myths for keeping guacamole from going brown.  Because it has just oxidized, it is still safe to eat when it is brown, but it is not very appetizing.  The acid in the lime does a pretty good job of keeping it green for a few hours.  I have also heard from several people that placing the avocado stone in the guacamole will keep it from going brown as well.  I'm not sure if that is a myth or not, but those who do it swear it works!

Monday, July 14, 2014

Frozen Chocolate Almond Banana Bites


I'm in the middle of a really intense art class for my Masters degree right now and have been creating "art" for about 14 hours a day, so this week I'm going to share with you a really easy yet delicious recipe I have slightly adapted from Angela Liddon's She Glows cookbook.  This treat is perfect for hot summer nights when you are craving ice cream but don't want all the sugar.  There are just a few ingredients, and they are easy to put together.  If you've ever had frozen chocolate covered bananas at the fair (or Folk Fest), you will love these.  You will notice in the picture that I added raw cacao nibs to mine, but I don't think it is necessary.  You could try adding shredded coconut, though.

Serves: that depends on how much will power you have! (Makes about 24 pieces)

Ingredients:

2 large bananas, peeled and sliced into 24 thick rounds
3 Tbsp natural peanut, almond, or other nut butter (my favourite is Mystery Butter, which is a combination of cashew butter and almond butter - not such a mystery...)
1 tsp coconut oil
2 oz 70% chocolate
24 roasted almonds

Directions:

1. Cover a baking sheet with parchment paper, and place the 24 banana rounds on the paper.

2. Top each piece of banana with 1/2 tsp of nut butter.  Place one whole roasted almond into the nut butter, on top of the banana round.

3. Cover with plastic wrap and place in the freezer for at least 30 minutes.

4.  In a small saucepan over a very low heat, melt the coconut oil and chocolate together.

5. Using a teaspoon, drizzle the melted chocolate over the frozen banana-almond pieces.

6. If you want, stick a toothpick (unflavoured!) into each piece.  Cover with plastic wrap again, and place back in the freezer for 15 - 30 minutes to firm up.  Once the pieces are frozen, you can either eat them or transfer them to a freezer bag to store for longer.  If you store them longer, partially thaw them at room temperature for a few minutes before eating them.  Enjoy!


Shopping Tips:

1. Many different kinds of nut butter can be found in the natural foods section of any major grocery store.

2. You can buy roasted almonds, or bake them at 350 degrees Fahrenheit for 5 - 7 minutes to make your own.

Monday, July 7, 2014

Dairy-Free Cucumber Dill Salad Dressing


I think I've mentioned before that salads are not one of my favourite meals.  I always feel like they are too light and leave me with an uncomfortable feeling in my stomach if I just eat a bunch of raw vegetables.  However, in the summer when everything is fresh and the weather is hot, I don't always like to cook, and salads are a great, quick meal.  I've found that if I include ingredients with substance (like gains, beans, nuts, etc.) and add a hearty homemade dressing, salads can be a satisfying meal that do not leave me with gut rot.

This dressing will make 3 - 4 large salads.

Ingredients:


2 Tbsp raw cashews, soaked for at least 4 hours
1/4 small ripe avocado
2 Tbsp extra virgin olive oil
1 Tbsp lemon juice
1 Tbsp white wine vinegar
1/2 tsp salt
4 Tbsp fresh dill
6" of cucumber, chopped
1-2 cloves garlic
black pepper

Directions:

1. Blend all ingredients in a bullet-type blender or small food processor until creamy and combined.  If needed, add a bit of water to make the dressing thinner.

I served this dressing on a salad of baby romaine lettuce, cucumber, cocktail tomatoes, cooked and cooled quinoa, hemp hearts, basil, and toasted almonds.  Enjoy!


Shopping Tips:

1. Buy avocados at least two days before you need them.  Let them ripen on the counter until they are a bit soft, and then put them in the fridge until you need them.

2. This dressing will keep in the fridge for about 3 days.

Monday, June 30, 2014

Broccoli Power Bowl with Sesame Orange Sauce


For the past month, I've been taking a "Learn to Run" clinic. And for someone who hates running, I've been totally surprised by how easy it has been.  I'm still not someone who would combine "fun" and "run" in the same sentence, but I will say that it has not been horrible.

Since the clinic is in the evenings, one of the challenges has been finding something quick, nutritious, filling, yet light to eat.  I have been told that it is not a good idea to eat too much protein before running since it takes a lot of energy for your body to digest it, and ultimately, you want that energy to go to powering your body to run, so I have created this power bowl that will provide fuel and energy for any activity you may be doing.  If you are running, try to eat at least two hours ahead of time.  The sauce comes from Angela Liddon's Oh She Glows Cookbook.

For this recipe, I was able to find garlic scapes (the long curly things in the photo) and pea tendrils at the Farmers Market; however, you could use garlic cloves and spinach instead.

Serves 2 generously.

Ingredients:

3 Tbsp Shiro (light) miso
2 Tbsp rice vinegar
1 Tbsp sesame oil
1 Tbsp tahini (sesame paste)
1/4 cup fresh orange juice
1 tsp maple syrup (or other liquid sweetener)

1 cup farro or brown rice, cooked according to package directions

1 Tbsp coconut oil
1/4 tsp red pepper flakes
3 garlic scapes (or 2 garlic cloves) sliced thinly
1 head broccoli, chopped into bite-sized pieces
2 carrots, cut into coins
1 handful bean sprouts
1 bunch pea tendrils (or 1 cup fresh spinach, chopped)
2 Tbsp sliced almonds, toasted at 350 degrees Fahrenheit for 5 minutes
2 Tbsp fresh basil
2 tsp black (or white) sesame seeds

Directions:

1. Cook farro or brown rice according to package directions.

2. Blend the first six ingredients together in a blender, bullet, or food processor.  Set aside.


3. In a large frying pan, sauté coconut oil, red pepper flakes, broccoli, carrots, and a pinch of sea salt over medium heat for about 15 - 17 minutes.

4. Add the bean sprouts and pea tendrils and cook for another 2 - 3 minutes.

5. Add the sauce and heat through for another minute.


6. In two bowls, divide the farro.  Top with broccoli mixture and garnish with almonds, basil, and sesame seeds.  Enjoy!


Shopping Tips:

1. As I mentioned above, pea tendrils and garlic scapes are only available at Farmers Markets in early summer, so if you don't have them, just substitute with garlic and spinach.

2. Miso is sold in the refrigerated section of health food and Asian stores.  It is used to add depth to many dishes (including others on this site), so it is worth having in your fridge.  It lasts a long time and contains healthy probiotics among other health benefits.

3. Black sesame seeds are nice to have for the colour contrast, but white ones will work just fine.  You can toast them if you want, but be careful that they don't burn.

4. Tahini is one of the main ingredients in humus and can be found in any major grocery store.  It is usually in the world foods section or the nut butter section.

5. You can use toasted or untoasted sesame oil for this recipe.  I used untoasted.


Monday, June 23, 2014

Grilled Pineapple with Coconut Basil Dust


During the summer months, I like to eat lighter.  The days are longer and hotter, fresh fruits and vegetables are in season, and I have more time to cook.  Occasionally, at the end of a light meal,  I like to have something sweet and refreshing.  I'm not really a baker, though, and I also want to keep my desserts fresh and light.  The best way to do that is by incorporating fruit into dessert.  By grilling the pineapple on the barbecue, the sweetness intensifies, and there is an added dimension of smokiness.  The pairing of pineapple and coconut is classic, but the addition of basil is unexpected yet complimentary.  You can serve just the pineapple and basil dust for a really light final course, or add a scoop of Coconut Bliss dairy-free ice cream as I have done.  

Serves 2 - 4

Ingredients:

pineapple

2 Tbsp shredded, unsweetened coconut
2 Tbsp fresh basil
1 Tbsp coconut sugar
zest of one lime

Directions:

1. Toast shredded coconut in a dry pan over medium heat on the stove until it just starts to turn colour but is not brown.  Remove and cool.

2. Slice and core pineapple.  Grill for approximately 3 - 4 minutes per side over medium heat.  Pineapple will have grill marks and be tender throughout.

3. In a food processor, combine coconut, basil, sugar, and lime zest.  Pulse until well combined.


4. On a serving plate, place the ice cream if using, grilled pineapple, and top with basil dust.  Serve immediately and enjoy!


 Shopping Tips

1. When choosing a pineapple, check to make sure that the leaves are green and healthy.  The one in the picture above is not ripe because the body is still very green and firm.  When ripe, the bottom of the pineapple will start to turn yellow and it will smell pineapple-y and be slightly tender.  Once it starts to smell sweet, it is probably overripe.  Cut pineapple will keep in the refrigerator for several days and become sweeter as it sits, so it is better to cut it earlier than later.  Also, grilling the pineapple will intensify the sweetness.  It is better to grill slightly firm pineapple rather than pieces that are falling apart.

Monday, June 9, 2014

Brie and Sun-Dried Tomato Oat Cakes


Whole grain cakes are a great way to use leftover grains.  The starch in them solidifies as they cool and makes it even easier to form cakes that will hold together.  Grain cakes are also a flavourful way to get healthy fibre in your diet.  A plain side of grains is not always that appetizing.  Use a canning lid to make these easily and uniformly. This recipe is closely based on the one in Ancient Grains for Modern Meals by Maria Speck.  Great served with cucumber dressing and/or cucumber salad.

Makes 7 - 8 cakes.

Ingredients:

3/4 cups steel cut oats
1 1/2 cups water

1/3 of a small brie wheel
1 1/2 quick cooking oats
1/2 cup chopped red onion
1/3 cup ready to eat sun-dried tomatoes, chopped
1/3 cup pine nuts, toasted
2 large eggs, beaten
2 Tbsp fresh basil, chopped
2 tsp dried Italian herbs
1 clove garlic, crushed
1 tsp fresh red chile, chopped finely
1 tsp salt
1/2 tsp pepper

2 Tbsp coconut oil

Directions:

1. Bring steel cut oats and water to a boil.  Add a pinch of salt, simmer for 2 minutes, stirring occasionally. Remove from heat and let stand, covered, for one hour until water has absorbed.  Let cool.  (Otherwise, use leftover grains).

2. Combine all other ingredients together with the cooled grains.


3. Heat 1 Tbsp of coconut oil in a large frying pan on medium high heat.  Turn the heat down to medium and fry four cakes for 4 - 5 minutes on each side until golden brown.  Fry the remaining four cakes in the other 1 Tbsp of oil. Enjoy!


These can be served hot, cold, or at room temperature.


Shopping Tips:

1. There are quick cooking oats that cook in 1.5 minutes or 1 minute oats.  Either one will work, but do not use regular oats - they will not hold together.

2. You can use the brie with or without the rind on it.  It just depends on whether or not you like the taste.

Monday, June 2, 2014

Coconut Lime Halibut


I'd had the idea for this fish topping for a couple of days.  One of Scott's favourite meals is halibut on pea and basil risotto, so I was thinking of doing that, but the Italian risotto and the tropical fish didn't really seem to work together until I was struck with inspiration on the way to the Farmers Market on Saturday.  The inspiration was not the fresh produce at the market like you might expect, instead it was a gaudy advertisement for Tequila Lime Chicken at a fast food Tex Mex place.  As I drove by, I had the idea to use tequila instead of white wine for the risotto, and the result is this brightly flavoured party in your mouth.  Any part of this dish can be made on its own or paired with other dishes if you wish.  It looks like a lot of ingredients, but many of them are repeated.  I've just split them up to make it a bit easier.

Serves 2.

Ingredients:

2 pieces of fresh halibut or other firm white fish such as cod
1 Tbsp coconut oil
juice of half a lime
salt, pepper

1/2 cup unsweetened coconut
1/4 cup spinach
2 Tbsp basil
zest of one lime
3/4 tsp salt
1/2 tsp sugar

1Tbsp coconut oil
1 Tbsp butter
1/4 cup onion, diced
1 clove garlic, minced
2/3 cup arborio rice, uncooked
2 Tbsp tequila
2 1/2 cups chicken or vegetable stock, WARM
1/2 cup peas
1 cup spinach, chopped
1 Tbsp fresh basil, chopped
salt, pepper

Directions:

1. Preheat oven to 375 degrees Fahrenheit.

2. In a small food processor, blend together the coconut, spinach, basil, lime zest, salt, and sugar.  Set aside until later.


3. In an oven proof dish, rub a bit of the coconut oil on the bottom of the dish and place the fish on top.  Cover with the remaining coconut oil, the lime juice, salt, and pepper.  Just use a pinch of salt since the topping contains salt.

4. In a medium sauce pan, melt the coconut oil and the butter.  Sauté the onions and garlic until they are soft and translucent.  Add the dry rice to the pan and stir until coated.  Continue stirring for another minute.

5. Add the tequila and stir vigorously with a wooden spoon until it has evaporated.  Turn the burner down to medium-low.  Add approximately 1/2 a cup of the warm stock to the pot and continue to stir.  This will develop the starch in the rice and result in a creamy risotto.  When the stock has almost completely evaporated, add another 1/2 cup.  Continue doing this until the stock is all absorbed and the rice is cooked through.  It will take 25 - 30 minutes.  Continue to stir regularly.


6. When there is about 20 minutes left in the cooking time of the rice, put the halibut in the oven.

7. When the rice is cooked through, add the frozen peas, spinach, and basil.  Cook for another 3 minutes until the peas are cooked.  Season with salt and pepper.


8. Plate the risotto with the halibut on top (squeeze on a bit more lime juice, if needed).  Top with the coconut lime crumble and enjoy!


Shopping Tips:

1. Buy a good quality virgin coconut oil.  For this recipe, you want one that has a coconut flavour.  If you buy regular coconut oil, it will not have a coconut flavour.  There are supposedly many health benefits to cooking with coconut oil.  It has a high smoking point, so it will not go rancid as easily as if you sauté with olive oil.  Also, it is made up of medium-chain fatty acids, which apparently do not absorb into the body as readily as short and long-chain ones do...

2. You cannot make risotto with regular rice because the starch content is not high enough.  Make sure you buy arborio.  It is in all grocery stores, you just have to look for it.


Monday, May 26, 2014

Vegan Sausage and Pepper Pasta


I'm always looking for ways to make meals healthier, and sausages are one of the things that I like but that really need an update.  I usually cut one up into smaller pieces so that it flavours the entire dish without adding a ton of calories or unhealthy fat.  However, this vegan gluten-free sausage is a great way to get the flavour in a much healthier way.  It is based on a recipe by David Frenkiel and Luise Vindahl and is a bit like a falafel.  If you don't want a vegan sausage or don't have the time to make them, you can still make the pasta dish with a bit of regular Italian sausage.

After going to three stores to find basil, I struck out and opted for fresh oregano, but I would definitely use basil, if possible.

You will need cheese cloth and kitchen string to make the sausages.

Makes 5 sausages.  Pasta serves two as a main course (uses two of the sausages).

Sausage Ingredients:

1/2 cup ready-to-eat sundried tomatoes
3/4 cup toasted cashews
1/2 sweet onion, chopped
1/2 small red chili, seeded and chopped
6 unsulphured dried apricots
1/2 tsp cumin
1 Tbsp shiro miso (optional)
1 tsp salt
1 tsp paprika
1-2 garlic cloves
1 tsp oregano

1 cup brown rice flour
1 Tbsp xanthan gum
1 Tbsp ground flax seeds or ground chia seeds

1/4 cup extra virgin olive oil
1/4 cup water

4 1//2 cups vegetable stock

1 Tbsp olive oil, for frying

Directions:

1. In a food processor, pulse together the first 11 ingredients.

2. Add the next three ingredients and pulse until completely combined.

3. Add the olive oil and the water and pulse until mixture forms a dough ball.

4. Separate into five equal portions and roll into sausage shapes.  Wrap in cheese cloth and tie each end with kitchen string.


5. Bring the vegetable stock to a simmer in a large frying pan and simmer the sausages for 45 minutes, turning half-way through.

6. Remove the cheese cloth by cutting off the ends.  Then, fry the sausages in olive oil until they are brown on all sides, about 10 minutes.

7. If you are making the pasta, do so while the sausages are frying.  If you have leftovers, cool and freeze them.


Pasta Ingredients:

2 Tbsp extra virgin olive oil
1/4 tsp red pepper flakes
1/2 sweet onion, chopped
1 red bell pepper, chopped
1 orange bell pepper, chopped
1 yellow bell pepper, chopped
2 cloves garlic
8 cocktail tomatoes
2 Tbsp fresh basil, chopped or torn
salt, pepper
fresh parmesan (optional)

1/2 lb short pasta

Directions:

1. Boil a large pot of salted water for the pasta.  Start the rest of the recipe while the water comes to a boil.  When the water is boiling, add the pasta and cook according to package directions.

2. In a large frying pan, heat the oil and red pepper flakes.

3. Add the onion, peppers and a bit of salt to the oil and sauté until the peppers are just tender.


4. When there is about 3 minutes left in the cooking time of the pasta, add the garlic and tomatoes.

5. Add the cooked pasta to the peppers and toss to coat.  Add black pepper as desired.  Add slices sausage.  Serve topped with basil and parmesan (optional). Enjoy!


** If you would like a saucier pasta, you can use a 28 oz can of diced tomatoes instead of the fresh tomatoes.

Shopping Tips:

1. Rice flour and xanthan gum (pronounced zanthan) can be purchased at an organic or health food store.

2. So can unsulphured dried apricots.  If you can't find them, though, just use regular ones.

3. When they are in season, you can find many different colours of peppers at the Farmers Market or Italian Store.  Try different combinations.


Monday, May 19, 2014

Crunchy Baked Strawberry and Rhubarb Oatmeal


This recipe is adapted from one in Vegetarian Everyday by David Frenkiel and Luise Vindahl.  I call for this to be prepared the night before, in fact, the first time I made it, I took it to a breakfast potluck at work.  But, in a real pinch, it can be made the morning of.  It definitely benefits from sitting, though.  It can also easily be made vegan if you substitute almond milk and a flax or chia egg*.  If you use gluten-free oats, it is also a filling gluten-free breakfast.  One more option: If you pair it with ice cream, you can eat it for dessert!

Serves 4 - 6.


Ingredients:

2 stalks rhubarb, sliced
2 cups fresh strawberries, sliced
2 cups quick cooking oats
1 tsp baking powder
3/4 tsp sea salt
1/2 tsp ground ginger
1/4 tsp cinnamon
2 large eggs
21/4 cups milk
1 tsp pure vanilla extract
1/3 to 1/2 cup pure maple syrup, depending on your preference
1 Tbsp coconut oil, melted
1/2 cup hazelnuts
1/2 cup almonds
1/2 cup flaked coconut, pieces as large as you can find (I use dehydrated flakes)

Directions:

The night before you want to eat this...

1. Place the almonds and hazelnuts on a baking sheet and bake for 5 - 7 minutes. Chop to large chunks.

2. Place the sliced rhubarb and strawberries in a large round baking dish.


3. In a bowl, combine the oats, baking powder, salt, ginger, and cinnamon.  Spread on top of the fruit.


4. In the same, now empty bowl, combine the eggs, milk, and vanilla.  Pour on top of the oats, making sure everything is soaked.  Cover and refrigerate.

5. In the morning, preheat oven to 375 degrees Fahrenheit.

6. Combine the coconut oil, nuts, and maple syrup.  Spread on top of the oats.


7. Bake oatmeal for 40 - 50 minutes.  Let sit for about 5 minutes before serving.  Serve with yogurt, if you wish.  Enjoy!


*Vegan Egg:

For an egg alternative with no sacrificing in taste, combine 2 Tbsp chia seeds or ground flax seeds with 1/3 cup of water.  Let sit for 15 minutes.  This will replace the two eggs in the recipe.

Monday, May 12, 2014

Warm Halloumi Salad


Several years ago when we lived in England, Scott discovered donair kebabs (pronounced donner  kebahbs, for some reason).  These are not kebabs as we Canadians know them, but are actually donairs.  At the time, I was a fish-eating vegetarian (otherwise know as a pescetarian) and couldn't eat the meat donairs that he was eating; however, there was one little Lebanese shop down the street from us that served vegetarian halloumi donair kebabs.  I had never heard of halloumi before, but it is a wonderfully mild cheese that you can grill because it doesn't melt.  Depending on the kind you buy, it can be a bit salty and might need to be rinsed, but otherwise it is a great addition to many savoury meals.  This recipe is a healthy way to incorporate halloumi into a warm salad that makes a very filling meal.

Serves two as a main or four as a side.

Ingredients:

3/4 cup whole grains (spelt, wheat berries, farro)
2 Tbsp pine nuts
2 Tbsp extra virgin olive oil
1/8 tsp red pepper flakes, or more or less to taste
1 large or 2 small leeks, cleaned and sliced into half moons
1 tbsp ready-to-eat sun-dried tomatoes (or packed in oil)
6 kalamata olives
2 cloves garlic, minced
1 clamshell of baby spinach, chard, kale
juice of half of one lemon
1 tsp honey
4 1/4 inch slices of halloumi
1 tsp Italian seasoning
1 Tbsp fresh basil
pepper

Directions:

1. Cook whole grains ahead of time.  Most will need to be soaked overnight.  I used spelt for this recipe.  Because I forgot to soak it, I poured boiling water over it and let it sit for two hours, did the same thing again, and then cooked it for about 25 minutes.  However, it can take up to 60 minutes of cooking time.  For that reason, it is always easier to cook whole grains ahead of time and then throw them into boiling water for 30 seconds when you need them.  You can even freeze them and then throw them in the pot, frozen, when you need them.

2. In a dry medium pan, toast pine nuts.  Keep an eye on them.  You want them to be brown, but they burn quickly.  Set aside to cool.


3. In the same pan, sauté oil, red pepper flakes, and leeks until leeks are tender, about 5 minutes.

4. Meanwhile, chop the tomatoes, olives, garlic, and basil.  Slice the halloumi and rinse, if needed.


5. When the leeks are tender, add the garlic and baby spinach.  Continue cooking until the spinach has wilted.  Add in the lemon juice, honey, and a bit more oil, if needed.  Add pepper but do not add salt as the olives and haloumi are both salty.

6. Add the cooked spelt to the leeks and spinach.  Toss to coat with the dressing in the pan.  Add in the olives and sun-dried tomatoes and set aside.

7. Heat a small pan.  Brush both sides of the halloumi with oil and sprinkle each piece with the Italian seasoning.  Grill the cheese in the hot pan on both sides until it is brown.  Place on top of the salad and top with fresh basil.  Enjoy!


This salad is great warm, cold, or room temperature although the cheese is best served hot.

Shopping Tips:

1. Halloumi is not sold in all grocery stores.  It is sold at Superstore as "halloom".  This is what I buy as it is not as salty as the haloumi that I have bought from specialty stores in the past.  They also sell a herbed version if you do not have Italian seasoning.

2. I buy the plastic clamshells of mixed baby spinach, chard, and kale, but if you can only get spinach, that's perfectly fine.

3. Whole grains are becoming more available, but I make a special trip to the organic store to buy them in bulk.  I then store them in 1L canning jars.  If you are going to use them quickly, you can store them in the pantry, otherwise, you can keep them in the freezer to keep them from going rancid. The same goes for nuts.


Monday, May 5, 2014

Perogy Bites


Every August, I go to the Heritage Festival in Edmonton where there are more than one hundred tents representing cuisines from all over the world.  I am ashamed to admit it, but each year I make a bee-line for the Ukrainian tent so that I can eat pierogies.  Why would I go to such a wonderful event and focus on pierogies, which I can get any day of the year?  Because I feel guilty eating them normally.  Full of white flour, cheese, butter, and potato, they are not exactly the healthiest dumplings on the planet.  I have been searching for a way to make them a bit healthier, and I've finally done it.  The greatest thing about these perogy bites is that they can be an appetizer or a meal, and if you leave off the bacon (or substitute it with coconut bacon), they are even vegan!  But don't worry, they taste just like pierogies - maybe even better - they are a cross between perogies, a baked potato, and chips.  To make this easier, make the cheesy cream a day ahead.

Makes 20 - 24 pierogie bites.

Ingredients:

Cheesy Cream:
1 cup plain, raw cashews (soak in water overnight, or at least 4 hours)
1/4 cup water
1/4 cup nutritional yeast
1 tsp white wine vinegar (or apple cider vinegar)
2 tsp fresh lemon juice
1/2 tsp salt
1/8 tsp onion powder
pinch cayenne pepper

1 long, skinny russet potato
2 Tbsp extra virgin olive oil, divided
2 large onions
2 green onions
1 rasher of bacon (optional)

Directions:

1. To make the Cheesy Cream, drain and rinse the cashews and then combine them with the water, nutritional yeast, vinegar, lemon juice, salt, onion powder, and cayenne pepper in a blender or bullet.  Blend until a smooth paste results, about 3 - 5 minutes.  Refrigerate until cool.


2. Preheat the oven to 425 degrees Fahrenheit.  Slice the unpeeled potatoes into 1/4 inch rounds.  brush them with 1 Tbsp of the olive oil, sprinkle with salt, and then bake on a parchment-lined baking sheet for 30 - 35 minutes, turning over halfway through.


3. Slice the onions into half-moon slices and sauté in the remaining 1 Tbsp olive oil on medium heat until they are caramelized and golden brown, about 30 minutes.


4. Slice the green onions into very thin slices, including the green bits.  If you are using the bacon, slice it into bits, and fry in a small dry pan until it is crisp.  Remove the bacon from the pan using a slotted spoon and drain on paper towel.  Set aside.

5. When the potatoes and onions are ready, assemble the bites.  On top of each potato round, smother about 1 tsp Cheesy Cream, add some caramelized onions, green onion, and bacon pieces, if using.  Enjoy!


Shopping Tips:

1. Russet potatoes are also called baking potatoes.  They are the ones with the scabby skin that look dirty, even when they are not.

2. Nutritional yeast is not yeast, but is a by-product of molasses.  It is an important source of vitamin B12, and it looks like yellow flakes.  See this recipe for a picture.  It smells like the cheese package in KD.  It can usually be found in the organic section of the grocery store, usually in the bulk bin.  Try sprinkling it on your popcorn for a cheesy alternative...

That's it.  Don't be scared by the planning required to make this recipe.  It comes together really easily.  If you can make perogies, you can make this recipe!


UA-45633129-1